LIVE MODE - Introduction
LIVE MODE - Introduction
LIVE MODE is a powerful new feature that allows you to seamlessly switch and layer Patches. LIVE MODE was designed for use in a live performance environment, but is also an inspirational way to interact with the sounds of Omnisphere in composition and production situations. LIVE MODE is especially useful for recording a multi-Part performance using a single MIDI track in your host sequencer.
Using Latch and Trigger Modes together with Live Mode allows powerful control over multi-Part performances that can be switched, layered and quantized in real time.
Use LIVE MODE instead of STACK MODE when you want to switch and layer Parts on the fly, or need enhanced visibility in a live environment. LIVE MODE is also ideal if you have two different MIDI hardware controllers connected to Omnisphere.
LIVE MODE offers multiple Part selection methods that can be MIDI Learned and used for switching and layering Parts. The different selection methods can all be used at the same time. This provides a creative and flexible method of working simultaneously with all the Parts that make up a MULTI.
Using LIVE MODE it’s possible to seamlessly switch between Parts without interrupting an already playing Part. For example, sustained notes on Part 1 won’t cut off or change after switching to and playing notes on Part 2.
When switching from a Patch with a long release time, a new Part can be selected and played without cutting off the release sound of the previous Patch.
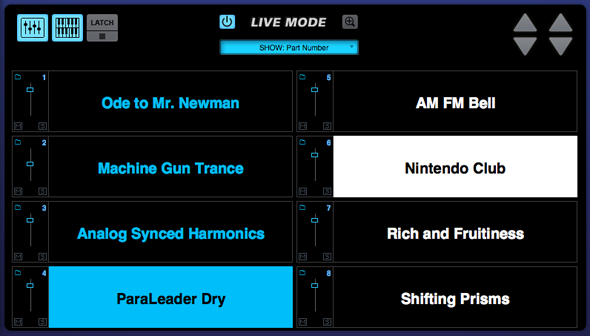
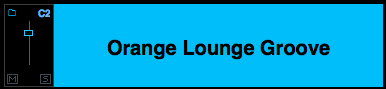
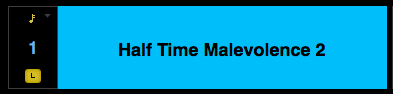
The LIVE MODE page has eight Slots, each corresponding to an Omnisphere Part. Patch names are displayed in large, easy to read type, so they can be read clearly while on stage.
A Part can be played when it’s selected (a highlighted Part indicates that it is selected). Parts that are not selected will not respond to incoming MIDI Notes. Patches can be layered by selecting multiple Parts.
In LIVE MODE, all of the Parts respond to a single MIDI channel (or two MIDI channels when in Dual Live Mode).
Any Part can be muted and soloed, and controls are available for each Part to adjust mix levels and access the Patch Browser.
Power Button

To enable LIVE MODE, select the Power Button to
the left of the LIVE MODE label.
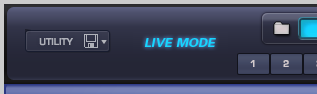
When LIVE MODE is enabled, you’ll see “LIVE MODE”
displayed on the left side of the Omnisphere header. This will be visible from
any page in the plug-in.
NOTE: Live Mode can be remotely controlled from an iPad using Omni TR
LIVE MODE - MIDI Learn
LIVE MODE - MIDI Learn

To MIDI Learn a Part, Right/Control-click on its
Slot to open the contextual menu, then choose the Part selection method you
would like to MIDI learn.
MIDI CC Learn:
Select MIDI CC Learn from the menu, and then
physically move a control on your MIDI device. The control on your MIDI device
will now select the Part.
MIDI Note Learn (Key Select):
Select MIDI Note Learn from the menu, and then play
a note from your MIDI controller. That note will now select the Part.
NOTE: Learned MIDI Notes will
display as red highlighted keys on the STACK MODE mini-keyboard. Select the
Notes setting on the STACK MODE page to display the mini-keyboard.
MIDI Program Change:
Select MIDI Program Change Learn from the menu,
and then press a Program Change button on your MIDI device. This Program Change
button will now select the Part.
There are three modes available (Touch, Latch,
and Switch) that determine how the Part selection methods operate. See the LIVE
MODE Settings section for details.
NOTE: Multiple assignments can
be made for a Part. For example, you can assign both MIDI Key Select and MIDI
CC to a single Part Slot.
LIVE MODE - Show Menu
LIVE MODE - Show Menu
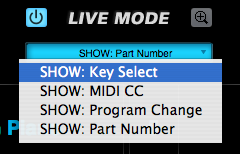
LIVE MODE offers four
ways to switch or layer the eight Parts; via MIDI Notes, MIDI CC messages, MIDI
Program Change, or via the mouse. The first three methods use MIDI Learn to setup how the Parts will respond. Although all four methods can be active at the
same time, only one can be displayed at a time on the interface. The SHOW MENU
lets you choose which Part selection method’s information is displayed on the
LIVE MODE page.
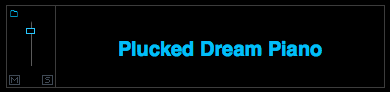
Part Numbers or MIDI
Learn assignments are displayed in the boxes to the left of the Part names, either
individually or grouped with the optional Mixer Controls. When the Mixer
Controls are enabled, this information is displayed in the upper-right corner
of the Mixer Controls box.
In the examples below,
the Parts are illustrated with and without the Mixer Controls enabled.
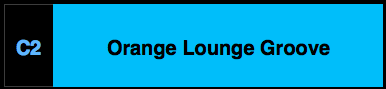
SHOW:
Key Select
Displays
the MIDI Note assigned to select the Part.
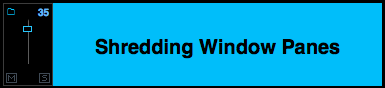
SHOW:
MIDI CC
Displays the MIDI Control Change number assigned to select the Part.

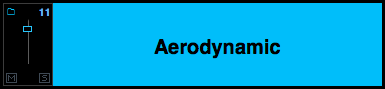
SHOW:
Program Change
Displays
the MIDI Program Change number assigned to select the Part.

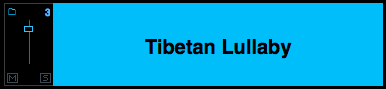
SHOW:
Part Number
This
is the default display, which corresponds to the actual Part Number.

LIVE MODE - Reordering Parts
LIVE MODE - Reordering Parts
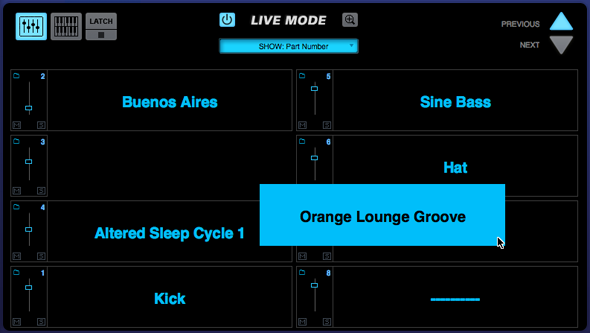
Parts can be reordered
by dragging and dropping them between the eight Slots. Dropping a Part into an
occupied Slot doesn’t delete the existing Part. Instead, all the remaining
Parts will move to make room for the dropped Part.
NOTE:
Reordering Parts in the LIVE MODE display will not change their positions in
the MIXER. For example, a Patch loaded into Part 3 of the MIXER will remain as
Part 3, regardless of which Part Slot it occupies on the LIVE MODE page.
NOTE: MIDI
Learn assignments are specific to the Slot, not to the Part. When reordering
Parts, MIDI Learn assignments do not move with them, but remain with the Slot.
LIVE MODE - Mixer Controls
LIVE MODE - Mixer Controls

Displays the basic mix
controls for each of the eight Parts, and includes a Mute button, Solo button,
a Level slider and a Folder icon to access the Patch Browser. Any changes made
using the Mixer Controls on the LIVE MODE page will be reflected on the MIXER page, since they are the same parameters.

|
Mute – Mutes the Part. Multiple Parts can be Muted. This is
a duplicate of the Mute button from the MIXER page, and can be MIDI Learned. |
| |
|

|
Solo – Mutes all Parts except the one that’s
been selected. Multiple Parts
can be Soloed. This is a duplicate of the Solo button from the MIXER page,
and can be MIDI Learned. |
| |
|

|
Patch Browser – Opens the Patch Browser, allowing
Patches to be loaded into the Part. Closing the Patch Browser returns to the
LIVE MODE page. |
| |
|

|
Level – Controls the output level of the Part.
This is a duplicate of the Level slider from the MIXER page, and can be MIDI
Learned. |
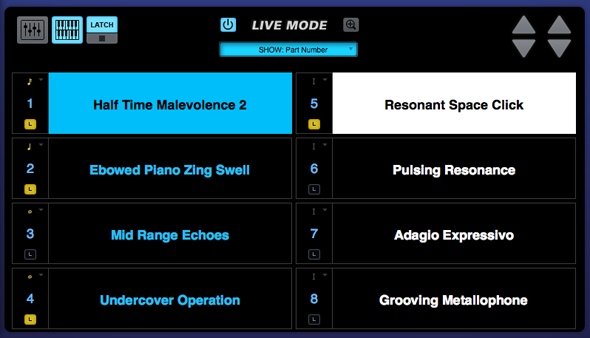
LIVE MODE - Dual Live Mode
LIVE MODE - Dual Live Mode
Dual Live Mode adds a
second MIDI channel to Live Mode, and is designed for use with two MIDI
controllers. It divides the eight Parts into two columns of four Parts each
(Parts 1-4, and Parts 5-8). Each column can receive MIDI messages on its own
MIDI channel. The color scheme is
changed so that the second column is highlighted in white instead of blue.
NOTE:
Parts can still be reordered in Dual Live Mode. Parts can also be moved between
the two columns (and therefore switched between MIDI channels), simply by
dragging them from one column to the other.
TIP: Using Dual Live Mode with two MIDI controllers, it’s possible to setup one MIDI Controller to be used exclusively for playing the eight Parts, while the other MIDI Controller is dedicated to Part selection.
LIVE MODE - Latch & Trigger Modes
LIVE MODE - Latch & Trigger Modes
The Latch Mode and Trigger Mode features extend the multi-timbral performance capabilities of Omnisphere, especially when used together with Live Mode or Stack Mode.
They enable real-time creation of complex, multi-Part performances with full synchronization between Parts, and across multiple Omnisphere, Trilian and Stylus RMX instances, without the need for traditional sequencing techniques.
Latch Mode causes notes to be held when played (or toggled off when played again), allowing quick triggering of repeating arpeggiated phrases or sustained sounds, while freeing the hands to play additional notes for layering, or for switching to other Parts to play new phrases on top.
Using Trigger Modes, incoming MIDI notes can be quantized in real-time, making it very easy to experiment and improvise along with other Parts and clocked sources without losing synchronization. These features are a lot of fun to use for jamming and building up ideas quickly!
Used together, they enable a wide range of creative performance, live remixing, and composition techniques to discover and explore.
LIVE MODE - Latch Mode
LIVE MODE - Latch Mode
When Latch Mode is enabled for a Part, repeatedly playing a note will toggle the note on and off. When it is toggled on, the note will continue to sustain, even if the note is released. Playing the same note again will toggle it off.
Latch Mode is accessed from the LIVE MODE page, using the Latch Mode View button.

NOTE: A Part’s Latch Mode status can also be viewed & changed from the STACK MODE page using Part Regions and their context menus, or from the EDIT Page, using the controls in the Footer.
Latch Mode allows rapid and creative layering of multiple notes or Parts, which you can then play along with by switching to other Parts in Live Mode. Using Latch Mode is extremely useful when working with rhythmic sounds, and used together with Trigger Modes, allows one-shot triggering of sounds quantized in real-time.
Latch Mode is set independently for each of the eight Parts. It is also independent from Live Mode, so Live Mode does not need to be enabled for Latch Mode to be active.
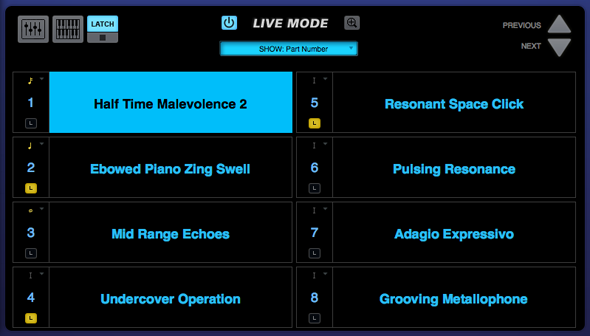
Viewing & Enabling Latch Mode
To view or adjust the Latch Mode status for a Part, open the LIVE MODE page, and select the Latch Mode View button to open the Latch Mode View.
NOTE:
The Latch Mode View button toggles between the Latch Mode and Live Mode views. Closing the Latch Mode View does not change or disable the Latch Mode or Trigger Mode settings.

When the Latch Mode View is open, you will see the Latch & Trigger Mode Part Controls.
Selecting the Latch Mode Icon for a Part will enable Latch Mode for that Part. The Icon will highlight to indicate that Latch Mode is enabled for the Part.
If you are already holding sustained notes when you enable Latch Mode, those held notes will be latched.
Selecting the Latch Mode Icon again will disable Latch Mode for the part.
....
NOTE:
Disabling Latch Mode for a Part while it’s playing will immediately send an “All Notes Off” message to the Part. The tails from FX and release stages from envelopes will continue to decay. The All Notes Off command will apply to all notes that are playing on that Part.
Latch Mode Icons are MIDI-learnable, so you can assign a hardware control to remotely enable or disable Latch Mode for a Part.
All Notes Off

Sometimes when using Latch Mode, it’s possible to lose track of which notes are latched, or you might have multiple Parts playing in Latch Mode that you want to stop simultaneously.
The All Notes Off button will send an “All Notes Off” message to all 8 Parts at once. FX tails and release stages from envelopes will continue to decay, so the cut off is not unnaturally abrupt. Notes being played on all Parts will be stopped, regardless of their Latch status.
The All Notes Off button is MIDI-learnable, which allows you to trigger it using a hardware controller.
NOTE:
If you have multiple Parts playing using Latch Mode and only want to stop one Part, disable that Part’s Latch Mode Icon to send an All Notes Off message only to that Part.
LIVE MODE - Trigger Mode
LIVE MODE - Trigger Mode
Trigger Mode enables real-time quantization of incoming MIDI notes, so that multiple Parts will always play in sync.
Trigger Mode is accessed from the LIVE MODE page, using the Latch Mode View button.
NOTE:
Trigger Modes can also be viewed & accessed from the STACK MODE page using Part Regions and their context menus, or from the EDIT Page using the controls in the Footer.
When playing complex phrases or rhythmic sounds along with other sequences, it can be difficult to sync those performances. Trigger Mode solves these problems by quantizing live MIDI input. With Trigger Modes other than Immediate selected, the playback from each incoming MIDI note is delayed until the the next point on the bar/beat grid is reached. This makes it much easier to play in a live performance setting with complete synchronization.
Trigger Mode controls the playback start time of MIDI notes played live via a MIDI controller or from MIDI notes sent from a MIDI track in the host sequencer.
Trigger Modes are set independently for each of the eight Parts, and Trigger Modes are independent from Live Mode, so Live Mode does not need to be enabled for Trigger Modes to be active.
Using Trigger Mode in Live Mode
Using the switching and layering capabilities of Live Mode together with Trigger Mode quantizing allows for some exciting performance possibilities.
For example, you can easily switch between or layer two different arpeggiating sounds, without worrying about falling out of sync as you play.
Trigger Modes can also be used while browsing and auditioning sounds. If you have selected a Trigger Mode other than Immediate for the Part, the sounds will be real-time quantized and will play in sync with the host or other clocked source as you audition them.
Viewing & Selecting Trigger Modes
To view and select the Trigger Mode for a Part, open the LIVE MODE page, and select the Latch Mode View button to open the Latch Mode View.
NOTE:
The Latch Mode View button toggles between the Latch Mode and Live Mode views. Closing the Latch Mode View does not change or disable Latch Mode or Trigger Mode settings.
When the Latch Mode View is enabled, you will see the Latch & Trigger Mode Part Controls. The Trigger Mode Icon will display the currently selected Trigger Mode for the Part, and allows you to access the Trigger Mode menu for that Part.
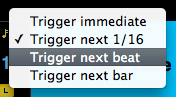
Select the Trigger Mode icon, and choose the desired Trigger Mode from drop-down menu. A checkmark will appear next to the selected option, and the Trigger Mode icon will change to reflect the selected Trigger Mode.
Trigger Modes
Immediate: This is the default Trigger Mode. MIDI input is not quantized, and playback of MIDI notes is immediate.
Next 16th: this option delays the playback of incoming MIDI notes to the next 16th note. In other words, notes are quantized in real time to the next 16th note. If you play ahead of the next 16th, there may be a slight delay before the note sounds. This delay will be a maximum of a 16th note at the current tempo. This mode makes it easy to play quick phrases in perfect sync with other Parts or clocked sources.
Next Beat: this option delays playback to the next beat. If incoming MIDI notes arrive ahead of the next beat, the delay is a maximum of one beat. Next Beat mode makes it very easy to trigger rhythmic patches in perfect sync, and when used together with Latch Mode, for layering phrases that are quantized to the beat in real time.
Next Bar: delays playback until the next bar. If MIDI messages arrive ahead of the next bar, the delay is a maximum of one bar. This mode is especially useful if you want to synchronize phrases on the downbeat of a measure. You can press a note anytime in the previous bar and it will wait until the next bar to play.
NOTE:
The selected Trigger Mode also affects a Part’s Arpeggiator, LFOs and Envelopes. These will also be delayed until the note itself is triggered.
LIVE MODE - Previous/Next
LIVE MODE - Previous/Next
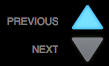
The Previous/Next arrows
step through the eight Slots one at a time, changing the selected Part without
stopping any notes currently being played. The Previous/Next arrows can be MIDI Learned, so they can be
triggered via MIDI messages.

When Dual Live Mode is
enabled, two sets of Previous/Next arrows will be visible. The left set will step through Part
Slots 1-4, and the right set will step through Part Slots 5-8. Both sets can be MIDI learned via
their respective MIDI channels.
LIVE MODE - Settings Zoom
LIVE MODE - Settings Zoom
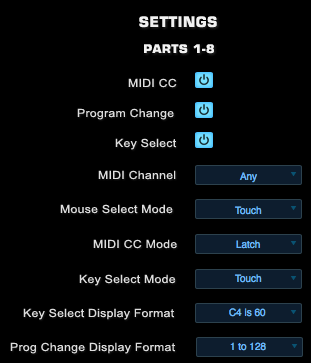
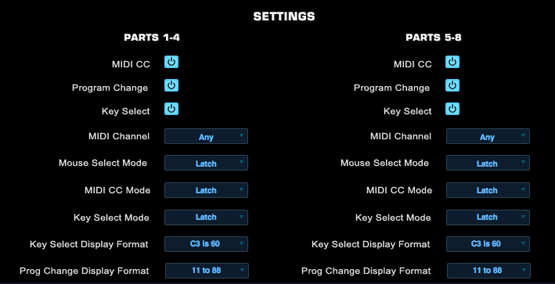
The SETTINGS page allows
the configuration of LIVE MODE parameters. These include the Part selection methods that LIVE MODE will
respond to, as well as settings for MIDI Channel, Modes, and Display Formats.
Settings in Dual Live
Mode
When Dual Live Mode is
enabled, the Settings options are duplicated for both channels and grouped as
Parts 1-4 and Parts 5-8 (corresponding to the two columns in Dual Live Mode).
This allows settings to be customized individually for each MIDI device.
NOTE:
LIVE MODE Settings are saved with the MULTI.
Key Select

When enabled, Parts can be selected using learned MIDI Control Change messages. When disabled, Parts will not respond to MIDI Control Change messages.
Program Change

When enabled, Parts can
be selected using learned MIDI Program Change messages. When disabled, Parts
will not respond to Program Change messages.
Key Select

When enabled, Parts can
be selected using learned MIDI Note messages. When disabled, Parts will not
respond to MIDI Note messages.
NOTE:
Even when the MIDI CC, PROGRAM CHANGE or KEY SELECT buttons are disabled, you
can still add new MIDI Learn assignments. LIVE MODE will make the new
assignments, but will not respond to those MIDI messages until the respective
Power Button is enabled.
MIDI Channel
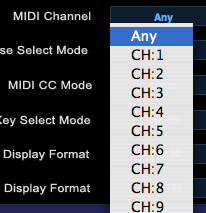
Determines which MIDI
Channel LIVE MODE will respond to.
Any – Will respond to MIDI messages sent from any MIDI channel.
CH:1
– CH:16 – Will only respond to MIDI messages sent from the
specified MIDI channel.
Mouse Select Mode
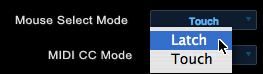
Parts can be selected
(or deselected) using a Mouse.
Latch – Latch Mode acts as an ‘on/off’ toggle,
so when a Part is first selected with the Mouse cursor, it can be played. When
it’s selected again, the Part is deselected. Using Latch mode, multiple Parts can be selected for layered
playing.
Touch – Only the Part currently selected with
the Mouse cursor can be played. Selecting another Part switches to the new
Part. Touch mode is useful for switching sounds quickly and is the default
Mouse Select Mode.
MIDI CC Mode

Parts can be selected or deselected using MIDI Control Change messages.
Latch - Latch Mode acts as an ‘on/off’ toggle. Sending a learned MIDI CC message to a Part will select it. Another message from that MIDI CC assignment will deselect the Part.
NOTE: Latch Mode is intended for use with MIDI controllers that are set to use momentary mode. If your MIDI controller is set to use toggle mode, you should use Switch Mode instead of Latch Mode when using MIDI CC.
Touch - Sending a learned MIDI CC message to a Part will select it, and all other Parts will be deselected. Only one Part can be selected at a time using Touch Mode with MIDI CC.
NOTE: If you want to use Touch Mode to select multiple Parts at once, please use Key Select rather than MIDI CC. Using Touch Mode with Key Select supports the selection of multiple Parts.
Switch - The default Mode. Parts will be selected corresponding exactly with the actions of the learned MIDI CC messages. If the learned CC is at 0, the Part is deselected. If the learned CC is at 127, the Part is selected.
NOTE: Each Part responds to the CC events from your MIDI controller based on how you have the MIDI buttons programmed. You can program your MIDI controller in toggle mode or momentary mode and the Parts will respond accordingly.
Key Select Mode
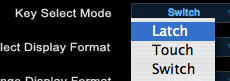
Parts can be selected or
deselected using MIDI Note messages, such as notes on your MIDI keyboard. Once
notes have been learned they will no longer trigger sounds when sent, but will
instead select and deselect Parts according to the chosen mode.
Latch – Latch mode acts as an ‘on/off’ toggle.
Sending a learned MIDI Note message to a Part will select it. Sending the note
again will deselect the Part.
Touch – Sending a learned MIDI Note message to a
Part will select it, and all other Parts will be deselected. If multiple MIDI Note messages are sent
at once, any combination of Parts can be selected at once. This is the default
Key Select mode and is very useful for live performance, since it allows
instant selection of any combination of Parts.
Switch – Parts will remain selected only while
holding down the assigned Note on a MIDI keyboard
Key Select Display Format
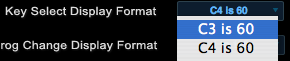
Middle-C (note number
60) is referred to in two different ways - as either C3 or C4 - depending on
the MIDI device manufacturer. You can choose either numbering convention, based
on your keyboard or your host software. Please refer to your device or host’s
owner’s manual to determine which is the correct setting.
Program Change Display Format
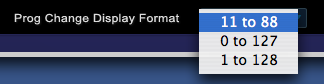
The LIVE MODE display
can accommodate different Program Change numbering systems. Some MIDI devices
have Program Change systems that are based on 8 numbers instead of 10. Others use 0-127 or 1-128. This option
allows you to change the display to match your MIDI device. Please consult your
MIDI device’s owner’s manual to determine which is the correct setting.