
All STEAM-based plug-ins need their large core libraries to be installed into the same STEAM folder on the computer. If Trilian is your first STEAM-based instrument, then you can choose to install the large core library files for Trilian anywhere you like on the computer. Wherever you choose to install those files, a STEAM folder will be created. This location then becomes the place where the large core library files of any other STEAM-based plug-ins will need be installed to in the future. If Trilian is not your first STEAM-based plug-in, and you’ve already installed another STEAM-based plug-in (like Omnisphere, for example), then you’ll need to install Trilian to the same STEAM folder that already exists.
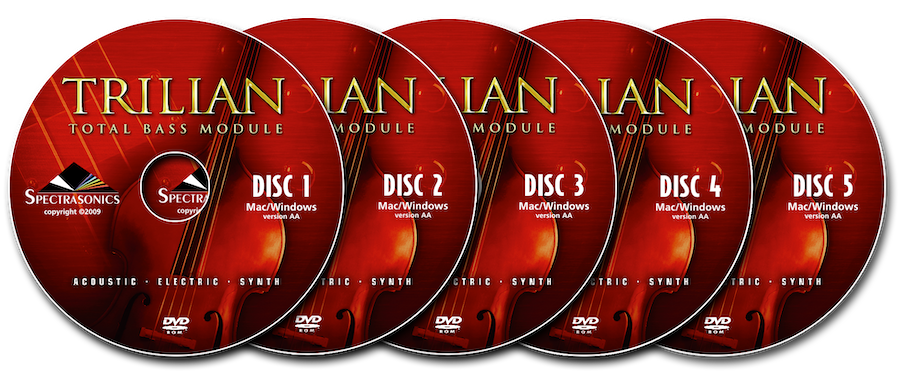
INSTALLING DISC 1
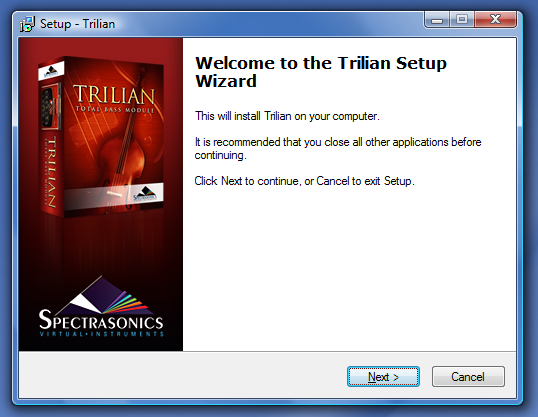
1. Insert Trilian Disc 1 into the computer’s optical disc drive. Double-click “My Computer”. Double-click the disc drive to view its contents and open the folder called “Windows.”
2. Double-click setup.exe to begin the installation of Trilian.
3. After reading the Introduction, click “Next.”
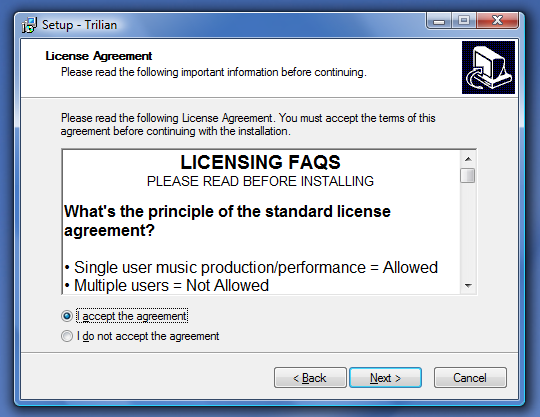
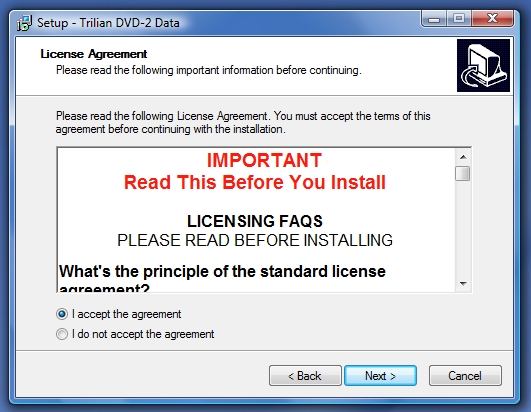
4. Read through the licensing FAQs and license agreement. If you agree to the terms of the license agreement, click “I accept the agreement.” Then click “Next.”
5. You will now need to select an installation destination for the VST plug-in version of Trilian on the computer.
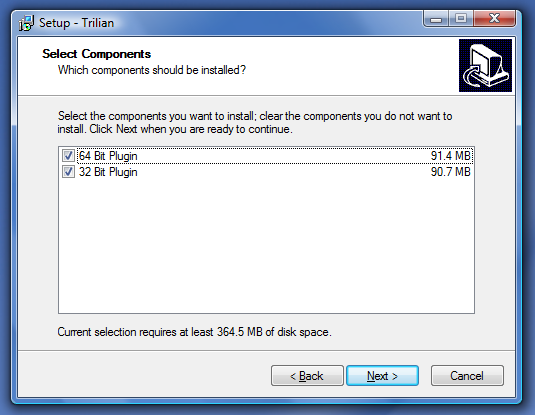
The default for the 32-bit plug-in is:
- C:\Program Files\Steinberg\Vstplugins
The default for the 64-bit plug-in is:
- C:\Program Files (x86)\Steinberg\Vstplugins
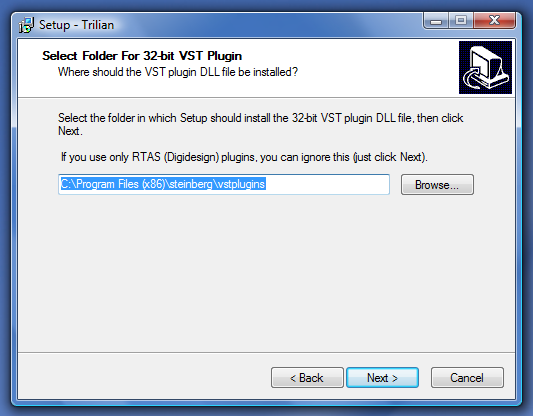
If you would like to change where the plug-in is installed, click “Browse” and select an alternated installation destination. The RTAS version of Trilian is automatically installed during the installation for all users to:
- C:\Program Files\Common Files\Digidesign\DAE\Plug-ins
6. Verify that the VST plug-in installation destination choice is correct. 64-bit Windows users will do this for both the 64-bit and 32-bit versions of the plug-in.
Click “Next” to continue.
7. The Trilian plug-ins will now be installed.
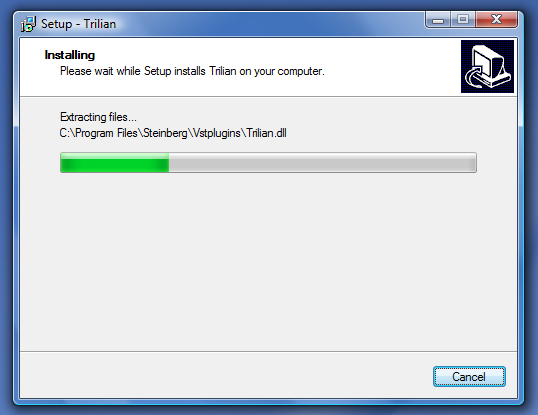
8. Once the plug-in installation is complete, it is now time to install the Trilian Core Library files. Click “Next” to continue.

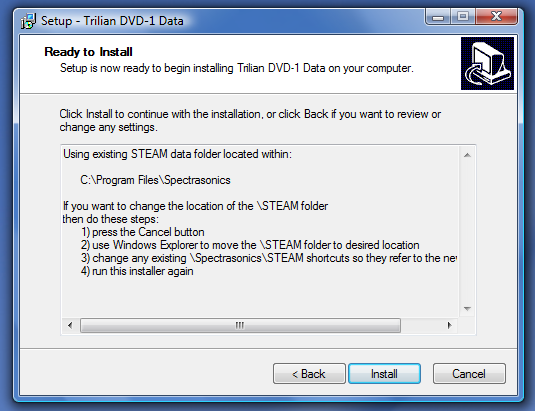
9. Now select where to install the Trilian large sound library files. You will need 35 GB of free hard drive space to install the data on all 5 discs. You must install every disc to the same location on your computer. The default installation destination is to the startup hard drive. If you would like to choose a custom install location to an external hard drive, select “Browse” and select a new installation location. That same location will need to be selected when installing the following discs. When ready to proceed, click “Next.”
10. Verify the install destination for the Trilian Core Library files then choose “Install.”
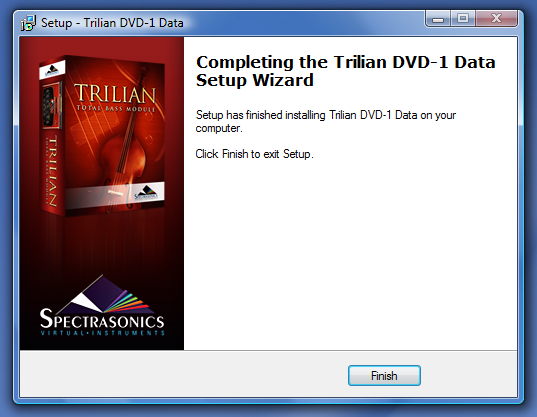
11. The Trilian Core Library files will now be installed. Please be patient as this process can take up to 45 minutes. When the installation has completed, please insert the next disc in the installation process.
INSTALLING DISC 2 ~ 6
The following instructions apply to Disc 2 through 6.
12. Insert Trilian Disc 2 into the computer’s optical disc drive. Double click “My Computer.” Double-click the disc drive to view its contents and open the folder called “Windows.”
13. Double-click setup.exe to begin the installation of Trilian.
14. After reading the Introduction, click “Next.”
15. Read through the licensing FAQs and license agreement. If you agree to terms of the license agreement, click “I accept the agreement.” Then click “Next.”

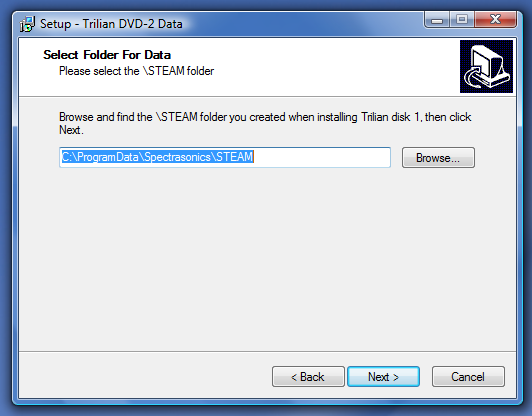
16. Now select the same installation destination (the STEAM folder) for the Trilian large sound library files as was selected for Disc 1. You cannot install the discs to different installation destinations. Then click “Next.”
17. Verify the installation destination matches the same installation destination from Disc 1 for the Trilian large sound library files then click “Install.”
18. The Trilian Core Library files will now be installed. Please be patient as this process can take up to 45 minutes. When the installation has completed, please insert the next disc in the installation process. Install Disc 3 through 6 just as Disc 2 was installed.
When all six discs have been installed, the installation is complete! It’s now time to open Trilian in your host sequencer and authorize it.
Please consult the Authorization section for assistance with authorizing Trilian.
Need more help with this?
Spectrasonics Customer Support