BROWSER - Introduction
BROWSER - Introduction
Omnisphere ships with a
massive library of sounds, so it requires a sophisticated way to search, filter
and browse its contents. The Browsers in Omnisphere were designed to provide an
intuitive and convenient way to quickly find exactly the sounds you need from a
library containing thousands of sounds.
NOTE: If you also have Trilian Installed, and are using Omnisphere Library Integration, Trilian Patches and Multis will also have unique images identifying the instrument or feel of the selected sound.
Using categories,
searchable attributes (called Tags), Favorites and Projects, the Browsers add a powerful and important feature to the workflow in Omnisphere. The more you understand about the Browser works, the better you will be able to enjoy the Omnisphere sound library.
There are three Browsers in
Omnisphere, one each for Multis, Patches, and Soundsources. All three Browsers
have the same layout and identical functions, but they interact with different
parts of the Core Library. For example, when the Multi Browser is open, only
Multis will be accessible in the Browser.
There are two ways to
quickly distinguish which Browser is open:
1. The title at the top of
the Browser.


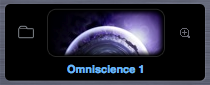
2. The image in the Info
Area.
 .....
.....
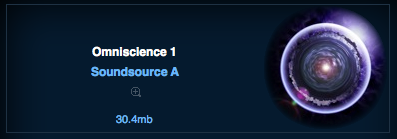
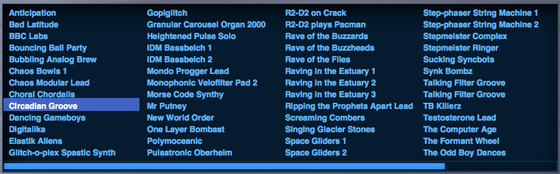
The Multi and Patch images are named
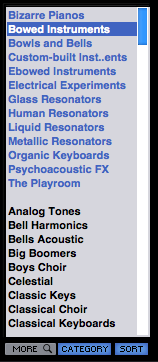
respectively. The Soundsource Browser displays unique images for the various
Soundsources, giving you a visual representation of what to expect from each of
the Soundsources.
BROWSER - Layout
BROWSER - Layout
The layout is the same
for all three Browsers, providing a common interface and workflow regardless of
which Browser is open. Once you familiarize yourself with the common layout and
operation of any Browser, you will be functional with all three Browsers.
NOTE: The Soundsource Browser does not contain the Lite Version Button and Lite Version Zoom Icon.
BROWSER – Header
BROWSER – Header

TheThe Browser Header contains the Browser Title and a Memory Meter, controls that let you apply filtering options using the Directory Menu and Search Field, buttons that allow selection between the two browsing modes (Attributes or File Directory), and a Preview Load button that toggles between loading methods; Preview Load and Auto Load (the default behavior when Preview Load button is disabled).
In addition, the Lite Version Button and Lite Version Zoom Icon provide options for memory management and sample thinning.
NOTE: The Soundsource Browser does not contain the Lite Version Button or Lite Version Zoom Button.
Memory Meter
The Memory Meter is a gauge that shows how much Virtual Memory the instance of the plug-in is using.

If the Memory Meter approaches full, you will see a popup warning, and may need to take steps to reduce memory usage, such as enable the Lite Version of Patches, or reduce the Pre Load Memory parameter on the System Page.

The circular meter is a smaller version of the linear meters that are found on the System Page and the Lite Version Zoom Page in the Patch and Multi Browsers.
NOTE: If you set a Memory Limit on the System Page, this gauge will show the amount of memory used relative to the selected limit. For example, if you set the limit to .5Gb, and load .4Gb of sample data, the gauge will show roughly 80% full, even if you have far more system memory available.
NOTE (Mac only): If you have selected Sample File Server using the System Page Streaming Mode settings, the Meter will not display memory usage.
BROWSER - Filters
BROWSER - Filters
The four-column layout of the Browser Filters
provides both hierarchical and Attributes-based filtering functions, and
operates in two distinct modes.
In Attributes Mode, the Browser Filters display
selectable Category and context-sensitive Attributes columns based on the tags
that have been added to the Multi, Patches or Soundsources.

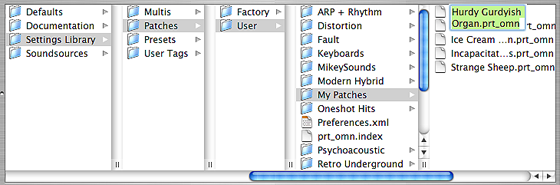
In File Directory Mode,
the Browser Filters display folders and files just as they are stored in the directory
on your computer’s hard drive.

The Browser Filters can be displayed in larger columns by using the 5-Column View Mode.
BROWSER - Info Area
BROWSER - Info Area
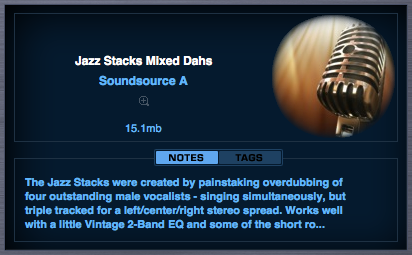
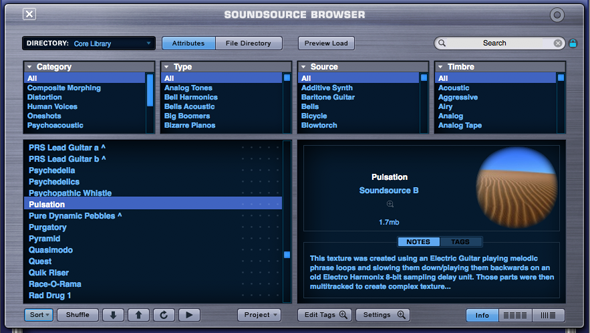
When the Info View is selected, the Info Area provides detailed information about the selected sound in the right column. The image in the right column also helps distinguish which Browser you’re using. This is the default View Mode for all Browsers.
BROWSER - Footer
BROWSER - Lite Version
BROWSER
- Lite Version
The Lite Version feature provides added flexibility when loading Patches and Multis to help you manage available memory resources and is especially useful for quick loading and auditioning sounds.
Enabling the Lite Version Button allows you to reduce, or “thin” the number of samples that are loaded with a Patch or Multi.
When this button is enabled, the thinning settings from the Lite Version Options Zoom are applied.
This feature is especially useful when loading Trilian sounds into Omnisphere using Omnisphere Library Integration. Many of the sounds included in the Trilian Factory Library are quite large, and contain thousands of samples, with some over 2 Gigabytes in size! These can place a heavy demand on available memory and take a longer time to load.
NOTE: All Thinning options applied here are saved with the song, the Patch, or the Multi, and are recalled the next time you load. However, nothing is saved until you specifically save your host song, or save the Omnisphere Patch or Multi.
NOTE: The Lite Version Button will reset to its default disabled state when you close the Browser. To keep it enabled, select the “Keep Lite Version Selected” option in the Lite Version Options Zoom pane.
Lite Version Options Zoom Pane
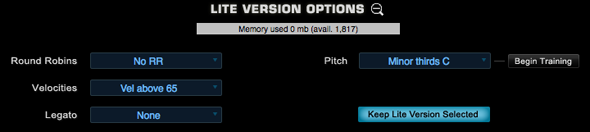
Selecting the Lite Version Zoom Icon provides access to a number of thinning options, which allow you to customize the Lite Version settings.
At the top of the Zoom window is a Memory meter that shows current Virtual Memory usage.
NOTE: If you set a Memory Limit on the System Page, this gauge will show the amount of memory used relative to the selected limit.
Round Robin
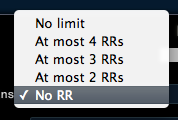
Soundsources can include a large number of Round Robin samples per zone, so these can add significantly to the size of the Soundsource. This option lets you control the number of Round Robin samples that are loaded with the Patch or Multi.
In many cases, you can save quite a bit of memory by reducing Round Robins to ‘At most 2 RRs’, without sacrificing the more realistic feel that Round Robins provide. Selecting “No RR” will result in no Round Robin samples being loaded with the Patch or Multi. Selecting “No Limit” will load all of the Round Robin samples available.
NOTE: Most Omnisphere sounds do not contain Round Robin samples. However, if you are using Trilian sounds inside Omnisphere, this feature becomes very important, as Trilian sounds contain a very large number of Round Robin samples.
Velocities

Soundsources may also contain a very large number of velocity switching samples mapped across many regions of the entire keyboard range. This setting provides a variety of options for reducing the number of velocity switched samples that are loaded with the Patch or Multi. To apply Velocity thinning, select from the options in the drop down menu.
No Limit
Will load all Velocity switched samples.
Every other
Will load every other Velocity switched sample.
Every third
Will only load every third Velocity switched sample.
Every fourth
Will only load every fourth Velocity switched sample.
Velocities above
Selecting a value from this menu, for example, 64, will only load Velocity switched samples mapped to a Velocity of 64 and above.
Velocities below
Selecting a value from this menu, for example, 100, will only load Velocity switched samples mapped to a Velocity of 100 and below.
NOTE: When thinning Velocities, there are no gaps in the sound. The remaining Velocity switched samples will adjust to be triggered across the full Velocity range.
Legato
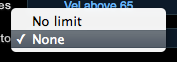
This option determines whether Legato Soundsources are loaded or not.
If “No limit” is selected, Legato Soundsources will be loaded. If “None” is selected, no Legato Soundsources will be loaded.
NOTE: Omnisphere sounds do not currently contain Legato Soundsources. However, if you are loading Trilian sounds in Omnisphere, this feature becomes very important for overall memory management.
Pitch Thinning

Omnisphere Patches & Multis can contain a huge number of samples mapped across the full keyboard range. Pitch Thinning lets you limit the samples that are loaded to match either a “trained” range of played notes, or a selected Scale or Interval. Using Pitch Thinning can substantially reduce the number of samples loaded with the Patch or Multi.
Trained Pitch Thinning

With Trained Pitch Thinning, you can load only the samples used during a performance.
For example, if you are working on a melodic phrase that has notes in a limited range, say from C2 to C4, by using Trained Pitch Thinning, you can speed up load times, and reduce memory usage by loading only the samples used in that range.
If you have recorded an Omnisphere part in a song, and want to speed up load times and conserve memory, you can apply Trained Pitch Thinning by playing the MIDI clip in the host. Omnisphere will then only load the samples used in the actual phrase.
To use Trained Pitch Thinning, select the Begin Training button. Play a range of notes (or a MIDI clip in the host), and then select the Finish Training button. This will limit the loaded samples to the note pitches that were played during training.
Pitch Thinning Using Scales & Intervals
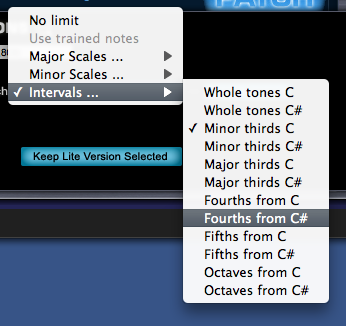
To limit loaded samples to a specific Scale or Interval, select the Pitch Thinning drop-down menu, and select an option from the available sub-menus. You can select from Major or Minor Scales, or from a variety of Intervals.
NOTE: Although only a limited set of samples will be loaded, this won’t result in “silent zones” on the keyboard. All notes will still play, but will be stretched from the nearest pitched sample.
NOTE: The Pitch Thinning options on the Lite Version Zoom are the same as those found on the Soundsource Zoom Edit View. However, the Lite Version feature affects the entire Patch or Multi, while the Soundsource Zoom options affect only the individual Soundsource. Use the Soundsource Zoom Edit View if you want to apply different thinning options to each Layer in a Patch.
Lite Version Default Settings
The Lite Version Default Settings are useful for quick loading, and easy auditioning of complete sounds. Unlike “Preview Load”, which loads the samples only for a limited range of notes, Lite Version applies sample thinning, loads the sound across the entire keyboard range, and is immediately playable after loading.
When Lite Version is enabled with the default settings, the following settings will be in effect:
- Round Robin: No RR samples. No Round Robin samples will be loaded.
- Velocities: above 65. Only Velocity switched samples mapped above a Velocity of 65 will be loaded.
- Legato: None. No Legato samples will be loaded.
Keep Lite Version Selected Button


The Lite Version Button will reset to its default, disabled state when you close the Browser. When this option is enabled, the Lite Version Button in the Browser will remain enabled, even after closing the Browser. Think of it as changing the default state of the Lite Version Button to ‘enabled’.
BROWSER - Access
BROWSER - Access


Anywhere that you see a
Folder Icon Button, you will be able to access a Browser by clicking on the
Folder. If there is a Name Display next to the Folder, you can also click
inside the Name Display to open the Browser.
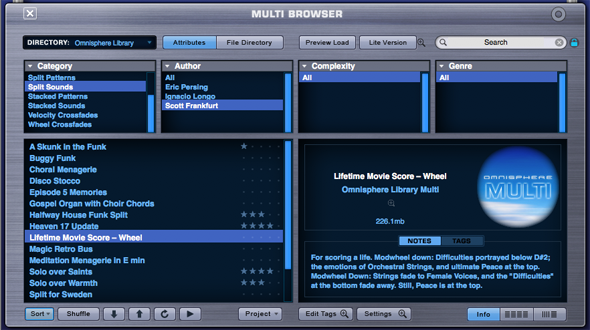
BROWSER - Multi Browser
BROWSER - Multi Browser
The
Multi Browser is accessed using the Multi Display in the Header, which is
always visible and available from any page in Omnisphere. Select the Folder
Icon Button or click inside the Multi Name Display to open the Multi Browser.

NOTE: The Multi
button does not have to be selected to access the Multi Browser. You can access
the Multi Browser from any page in the plug-in.
The
Multi Browser
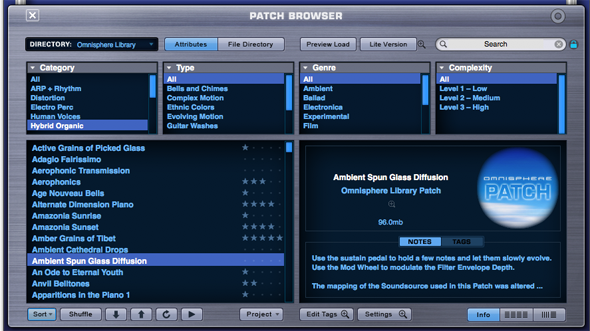
BROWSER - Patch Browser
BROWSER - Patch Browser
When
a Part is selected (using the Part 1 ~ 8 Buttons), the Patch Browser is
accessed from the Patch Name Display, which is always visible and available
from any of the Part pages. Select the Folder Icon Button or click inside the
Patch Name Display to open the Patch Browser.

The Patch Browser can also be accessed from the Mixer page (Patch Name
Displays), and from the Live Mode page when Mixer Controls are enabled.
Mixer
Patch Name Display

Live
Mode Mixer Controls
The Patch Browser
BROWSER - Soundsource Browser
BROWSER - Soundsource Browser
The
Soundsource Browser is accessed from either the Main Page or the Edit Page.
Main Page
On
the CONTROLS sub-page, select the Folder Icon Button or click inside the
Soundsource Name Display to open the Soundsource Browser.

On
the INFO sub-page, select the Folder Icon Button to open the Soundsource
Browser.
Edit Page
In
the OSCILLATOR section, select the Folder Icon Button or click inside the
Soundsource Name Display to open the Soundsource Browser.
Soundsource
Browser
BROWSER - Search and Filtering
BROWSER - Search and Filtering
All searching and
filtering is accomplished from the Browser Header (using the Directory Menu and
the Search Field) and the Browser Filters. There are different options
available for filtering the results, and setting up how sounds are browsed,
displayed and previewed.

The Directory Menu, Search
Field and Browser Filters always work in combination with each other, and used
together will further refine the results. The order in which they are applied
isn’t important. You can apply selections and criteria using all three methods
in any order, and you will still end up with the same filtered results.
BROWSER - Directory Menu
BROWSER - Directory Menu
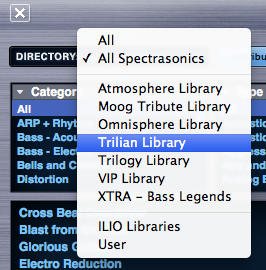
The Directory Menu allows
filtering by libraries. Select the Directory Menu down arrow or name display to
open the menu. After selecting a Library, only the sounds in that Library will
be displayed in the Browser.
They can be further refined
using the Search Field and the Browser Filters. Selecting ‘All’ will remove any
Directory Menu filtering and show all Libraries simultaneously.
After saving custom Multis
or Patches, the User Library will be available from the menu. Selecting this
Library will display only custom User Multis or Patches in the Browser.
For additional details refer to the Browser Saving & Managing Sounds section.
NOTE: If you also have Trilian Installed, and are using Omnisphere Library Integration, Trilian libraries will also appear in the DIRECTORY Menu.
BROWSER - Search Field
BROWSER - Search Field
The Search function in
Omnisphere works much like a search engine. Click anywhere in the Search Field
to enter search text. Press the Enter/Return key to initiate the search and
view the filtered results.

The Search function will
check sound Names, Tags, Keywords, and even Notes text to determine the search
results.
Selecting
Attributes in the Browser Filters can refine the search even further. The more
selections that are made, the narrower the search results will be. To search
the entire Core Library, be sure to select “All” in each of the Browser Filter
columns.
Search Lock

By default, when a Browser is closed the Search Field will be cleared.
Enabling the Search Lock button allows search entries (and the filtered results) to be retained after the Browser is closed and re-opened.
NOTE: The Search Lock setting is saved as a global user setting. For example, if you enable Search Lock, it will remain enabled the next time you open an instance of the plug-in.
NOTE: When you change the Search Lock setting, that change is applied to all Browsers. For example, enabling or disabling Search Lock in the Patch Browser also enables or disables it in the Multi and Soundsource Browsers.
Search Clear

Select the Search Clear button to instantly clear the Search Field. When you select the Search Clear button, the displayed sounds will immediately update accordingly.
NOTE: You can apply the Search Clear button with Search Lock enabled. This allows you to make changes to your search criteria without changing the Search Lock status.
BROWSER – Filters (Attributes & File Directory)
BROWSER – Filters (Attributes & File
Directory)
Using Attributes Mode, filtering is achieved by selecting Categories or Projects and additional Attributes to refine the list of sounds. The first column drop-down menu allows you to select between “Category” and “Project” (if you have created any Projects), while the remaining Attribute columns may change their labels depending on the Category selection.
There
are two browsing modes available, Attributes Mode and File Directory Mode.
These are selected using the Attributes and File Directory Buttons, which will
toggle between modes.

Attributes Mode
Using
Attributes Mode, filtering is achieved by selecting Categories and Attributes
to refine the list of sounds. The first column will always be labeled
“Category”, while the remaining Attribute columns may change their labels
depending on the Category selection.
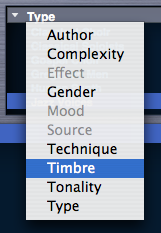
For
example, in the Soundsource Browser, if the Category “Psychoacoustic” is
selected, then the Attribute columns will automatically display Type, Source
and Timbre.

If the Category “Human Voices” is then selected, the Attribute columns will change
to Type, Gender and Technique.
These
changes are intended to reflect Attributes that make more sense in context to
the Category selection. These are recommended Attributes, but you can still
manually select different Attributes from the column drop-down menus.
NOTE: This behavior is dependent on the setting “Category
Sensitive Attributes” in the Browser Settings. Automatic Attributes changes
will only occur if this setting is enabled (the default state). If the setting
is disabled, the labels will remain static when changing Categories.
File Directory Mode
Using
File Directory Mode, the Browser Filters display a File Folder hierarchy that
matches how they are stored on your computer’s hard drive.
When
you select a Folder in a column, the list of sounds will be filtered to include
only the sounds that exist in the Folders below it in the file hierarchy.
This
traditional method of file browsing may be more natural to some Users, and is
useful when creating a large custom collection of Multis and Patches. You can
create a custom file directory hierarchy inside the STEAM folder, and organize
your custom Patches to suit your own needs. That hierarchy can then be directly
browsed using the File Directory mode of the Browser.
NOTE – Most of the Factory Library in Omnisphere does
not use folders or sub-directories, so File Directory mode is not particularly
useful for browsing Factory sounds.
BROWSER - Displaying and Navigating Results
BROWSER - Displaying and Navigating Results

There are numerous options available to change how sounds are organized and displayed, and for navigating the sounds in the Info Area. The controls for these options are found in the Browser Footer.
These tools allow you to sort sounds in different ways, including by Ratings, and because there are thousands of sounds to explore, these controls will help you explore more deeply into the Library. These Browser controls will also work on filtered results.
Sort Menu

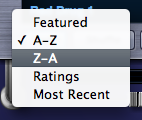
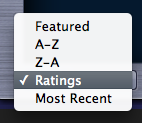
The Sort Menu includes four ways to sort the list of sounds.
Featured
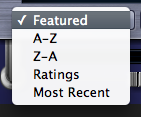
We're continually adding new sounds to the Core Library. Because the number of available sounds is so large, it isn't always easy to find the best examples of the newest sounds in the Library. The Featured menu option lets you quickly find and browse through a featured selection of new and interesting sounds included in the Core Library.
Selecting the "Featured" sort option will display Featured sounds at the top of the sounds list.
You will also find a special selection of Featured sounds when you're browsing the library by Category. For example, with the Featured sort option selected, if you select Synth Bass in the Category Attribute Filter, you'll see a specially selected list of Featured Synth Bass sounds displayed at the top of the list.
A-Z & Z-A
The A-Z & Z-A options provide a simple way to reverse the alphabetization of the patches. Select Z-A to reverse the order, and A-Z to restore it. The Browser display defaults to A-Z sorting.
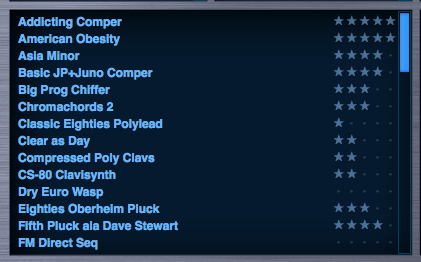
Ratings
All sounds in the library can be given ratings from 1 to 5 stars using the Ratings system. Selecting Ratings from the Sort menu will display rated sounds at the top of the Browser list, in order of their Ratings. For example, 5-star sounds will be listed first, followed by 4–star sounds, and so on.
Most Recent
This feature is intended to be used with User sounds. When this option is selected, the newest User sounds are displayed first.
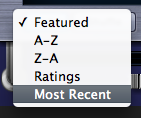
NOTE: This feature does not show the most recently added Patches to the Factory Library, just the User Library. If you want to view the most recently added Patches to the Factory Library, type in the version number of the current Patch Library into the Search field (i.e.: 1.5).
Shuffle Button

It’s a common error to only browse the sounds near the beginning of the alphabetical list. Every time the Shuffle Button is selected, the order of the sounds will be randomized. This button is useful for keeping the list of sounds fresh and inspiring, instead of always showing the same sounds at the top of the list.
Browser Stepper Buttons
The Stepper Buttons step
through the sounds in the Browser one at a time. When you step to the next
sound, it will be selected and loaded.


The Browser Stepper
Buttons can be MIDI Learned, and those assignments will apply to the Stepper
Buttons in all three Browsers.
The Steppers are
especially useful for browsing sounds quickly with Preview Load and Audition
Auto-Play enabled, or for conveniently stepping through a filtered selection of
sounds.
TIP
– MIDI
Learning the Browser steppers to switches on your MIDI controller is a great way to
speed up the auditioning process, especially when used with the “Auto-Play” and
“Preview Load” options enabled.
Refresh Button

Selecting this button will refresh the display of
sounds in a Browser. Using the Refresh button will ensure that all of the
available sounds are displayed. When changes are made to the library outside of
the Browser (e.g. after installing a library update or manually moving custom
Patches), or while Omnisphere is open, use the Refresh Button to update the
Browser display.
BROWSER - View Modes
BROWSER - View Modes
There are three modes available for viewing sounds: Info View, 4-Column View and 5-Column View. Selecting the Buttons shown below will toggle between modes.

Info View
This is the default view
for all Browsers. The sounds are listed on the left and the area on the right
contains details about the selected sound. If your mouse has a scroll-wheel, it can be used to scroll
through the list of sounds.

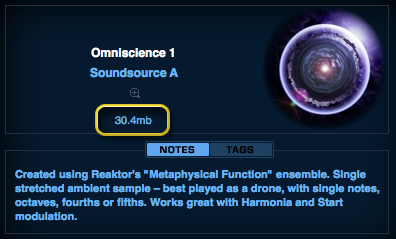
The info area on the
right includes the name of the sound, which part of the Library it belongs to
(or the current Layer, in the case of Soundsources), a Zoom Button to access
more detailed information, the file size of the sound, a thumbnail image for
that sound type, Notes for the sound, and a Tags view to quickly check its
Tags.
The advantage of using the Info View mode compared to the others is that important information about the selected sound (notes, tags, size, etc) is readily available.
4-Column View
To
see more sounds listed at once, select the 4-Column View. This will display the
results in four columns. The vertical
scrollbar is replaced with a horizontal scrollbar. Using the scroll-wheel on
your mouse will still work for horizontal scrolling in 4-Column View mode.
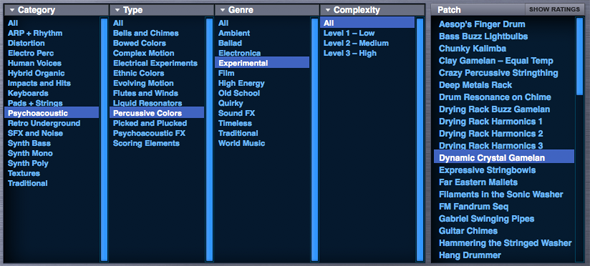
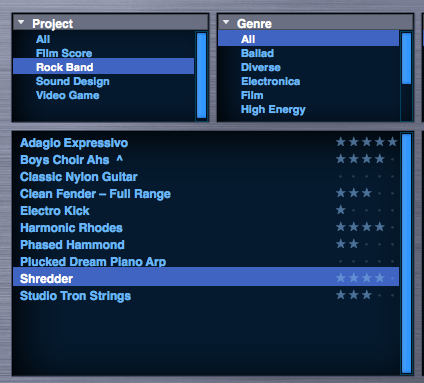
5-Column View
To see more attributes listed at once, select the 5-Column View. The Attributes are listed from left to right in a larger area. The sounds are listed on the right.
This view has the advantage of displaying attributes that in other views can only be displayed by scrolling. The ratings can still be displayed by selecting the “Ratings” button on the top right of the list of sounds.
NOTE: The View Mode is saved when you exit the Browser.
.
BROWSER - Info Zoom Views
BROWSER - Info Zoom Views

When the Info View mode is selected, the right column contains information about the selected sound. In addition, there is a Zoom Button that will open a Zoom View for additional details about the sound. The Zoom Views in the different Browsers contains similar information.
The Soundsource Zoom View will typically contain the most information, with details about the origin of the samples and suggestions for their application.
Soundsource Zoom View: Edit & Info Panes

The Soundsource Zoom View contains two sub-panes; the Edit Zoom and Info Zoom panes. Use the EDIT and INFO Buttons to select the desired view.
The Info Zoom pane shows the descriptions, keywords, and tags of the Soundsource. This is the default view when opening the Soundsource Zoom from the Soundsource Browser.
The Edit View provides access to the Sub-layer Mixer and Sample Thinning controls for the Soundsource.
To learn more about the Soundsource Edit Zoom, see the Edit Page: Soundsource Zoom section.
Full Size Image

The images for Multis and Patches are the same as
those found in the Info View.
For Soundsources. the image will be a
visualization of of the sound that it’s associated with. Similar sounds might
have similarly themed images. Sometimes this image might be rather abstract, or
it can be more literal. Many of the Soundsource images will be images of the
original item that was sampled.
NOTE: If you are loading Trilian sounds into Omnisphere using Omnisphere Library Integration, you will also see images for Trilian Patches and Multis.
File Size
This is the total amount of memory that is used
when the sound is loaded.
NOTE: If a Patch contains only
DSP waveforms (no Soundsources), no size will be listed.
More Info + WWW

Additional information about Omnisphere’s
Soundsources can be found on the internet. We’ve provided a web link button that will take you to a
webpage with further information about the sound and/or it’s author.
Legal Info

This will take you to a page that details all of
the legal information about how Omnisphere’s Soundsources can (and can’t) be
used as well as copyright information about how the samples and effects were
obtained and licensed.
BROWSER - Favorites & Projects
BROWSER - Favorites & Projects
Projects and Favorites provide tools for managing, organizing and recalling user-defined groups of sounds, making it much more convenient to navigate specific sounds, recall preferred sounds, and work efficiently with the enormous library contained in Omnisphere.
Projects let you collect sounds into organized groups for instant recall later, and you can identify Favorites by applying Ratings to Multis, Patches and Soundsources. Favorites can also be very useful for prioritizing sounds within Projects!
Projects and Favorites are global library tags and are saved automatically, available for later recall. They will also appear across multiple instances of Omnisphere. If you add Projects or Favorites to one instance, they will appear in any other instances that you have open, or that you open later.
BROWSER - Projects
BROWSER - Projects
A Project is a user-defined collection of sounds that are organized under a single, named group. This can be applied in many useful ways. For example Projects can be created and named according to jobs that you are working on, or created for different sessions, songs or styles.
You can add Multis, Patches and Soundsources to a Project. The Project system is flexible and easy to manage, and since you name and populate the Projects yourself when creating them, they can be organized in ways that are most meaningful to you.
When a Project is selected in the Browser, only the sounds that have been added to that Project will be displayed. This gives you instant access to filtered and organized selections of sounds.
Projects work well together with Favorites, offering additional sorting options, and with Search and Attribute Filters for further managing the display of your Project’s sounds.
Creating, Managing, and Accessing Projects
The Project Menu
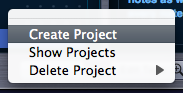
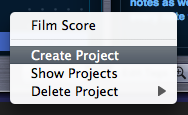
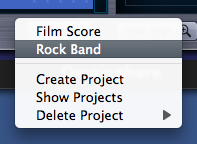
The Project Menu provides all of the options needed to create, manage and access Projects. Using the Project Menu, you can Create Projects, Delete Projects, add sounds to or remove sounds from a Project, and Show Projects in the Browser. These are the actions you can take using the Project menu:
Create a Project
Select “Create Project” from the Project Menu, type a name for the Project into the text field, and press Return/Enter on your keyboard.
 spacer
The Project is now created, and available to add sounds to.
After creating a Project, its name will appear in the top section of the Project Menu.
Add a sound to a Project
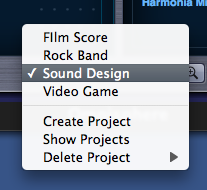
To add a sound to a Project, first select the sound in the Browser that you wish to add. Next, open the Project Menu and select the Project name you wish to add the sound to. That’s it!
Whenever that sound is selected, if you open the Project Menu you will see a checkmark next to that Project name, indicating that the selected sound is in that Project.
A sound can be added to multiple Projects. If a sound has been added to multiple Projects, you will see checkmarks next to the names of all the Projects it has been added to.
This makes it easy to quickly see if a sound has been added to one or more Projects.
Browse Projects
Once you have created one or more Projects and added sounds to them, you can then quickly browse your Projects to find and select the specific sounds you added to them.
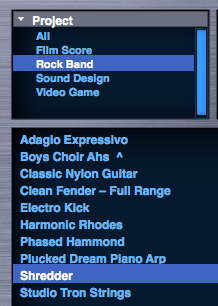
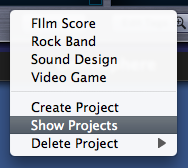
To browse your Projects, select “Show Projects” from the Project Menu.
The left-most attribute filter will change from "Category" to "Project", and all of your Projects will show up in the left-most attribute column. Select a Project from the Project list, and your Browser will display only the sounds contained in that Project.
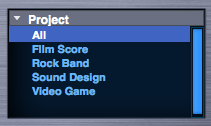
Select “Show Projects” from the Project Menu again, and the attribute filter will return to the Category view.
You can also switch between displaying Projects or Categories by selecting the left-most attribute filter menu, and selecting Project or Category.

Remove a sound from a Project
To remove a sound from a Project, first select the sound you wish to remove by selecting it in the Browser. Next, open the Project Menu and select the Project name you wish to remove the sound from (there should be a checkmark next to the Project name). To confirm that the sound was removed from the Project, select the Project Menu again and confirm that the checkmark was removed.
Delete a Project
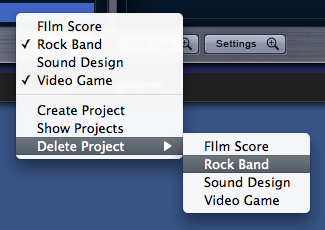
To delete a Project, open the Project Menu and select the Project you wish to delete from the “Delete Project” sub-menu. A confirmation popup will appear, asking you to confirm the deletion. Selecting OK will delete the Project.
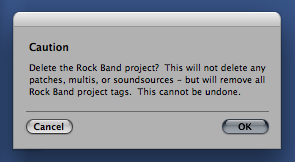

Deleting a Project doesn’t remove or delete any sounds from the library. It simply removes the tags assigned to that Project. If you have the same Project also being used in the Multi, Patch and Soundsource Browsers, you will have to delete the Project separately in those Browsers.
BROWSER - Favorites
BROWSER - Favorites
The Favorites feature in Omnisphere provides a familiar and convenient way of rating and organizing sounds in the library. You identify Favorites by applying Ratings to Multis, Patches and Soundsources, and can easily change or remove assigned Ratings. This feature is useful for identifying and organizing sounds by preference, or creating sub-groups inside Projects. You can also sort sounds in the Browser by Ratings, bringing your favorite sounds to the top of the Browser list.
Used together with the Projects feature, Favorites provides a powerful and convenient way to organize and manage the Omnisphere sound library.
Adding a Rating to a sound
To add a Rating to a sound, open the Browser and select one of the Rating Dots to the right of the sound’s name. The dots will change to stars when you select them. You can rate a sound from 1 star to 5 stars.


By selecting only the Rating Dots, you can rate sounds without loading them. This allows you to rate a large number of sounds very quickly, without having to load each one as you go along.
Changing or removing a Rating
After you have added a Rating to a sound, you can easily change it by selecting the dots (or stars) again.
There are two ways to remove the Rating from a sound: either click in the empty space just to the left of the Rating Dots, or CTRL/CMD-click on the dots/stars themselves.
Sorting by Ratings

To see your Favorites sorted according to their Ratings, open the Sort Menu in the Browser Footer and select "Ratings". The sounds in the Browser window will then be displayed with your favorite sounds at the top of the list, in order of their Rating. The top-rated (5-star) sounds will appear first, followed by 4-star sounds, then 3-star sounds, etc.
To return to an alphabetical list, open the Sort Menu again and select “A-Z”.
BROWSER – Selecting and Loading Sounds
BROWSER
– Selecting and Loading Sounds
Selecting a sound in the Browser also loads the sound. How quickly it loads depends on the size of the file, as well as the Preview Load and Lite Version settings that you have enabled or selected. Lite Version is especially designed for fast loading of ready-to-play sounds.
Auditioning Sounds
When browsing a substantial library, it’s important to have convenient ways of quickly auditioning the sounds. The Browser provides an Audition Button, the Lite Version button with multiple thinning settings available in the Lite Version Options Zoom, a quick Preview Load, and options in the Browser Settings for setting up the Audition and Preview Load behavior.
If Audition Auto-Play is enabled in the Browser Settings, then selecting a sound will automatically audition it. The Audition Note and Audition Note Length settings determine the pitch and duration of the auditioned note.

Select the Audition Button in the Browser Footer to hear a note played using the currently loaded sound. The sound will play for as long as the button is selected (or until it decays).
The “Audition Note” setting in the Browser Settings Zoom determines the pitch of the note.
Preview Load and Lite Version

Omnisphere provides different ways to control how sounds are loaded. These are Auto Load, Preview Load and Lite Version, and these can interact with each other for maximum flexibility.
Auto Load is what we call the default way that Omnisphere loads sounds, and is always active if Preview Mode is not enabled. Auto Load will load the complete sound, with all samples, across all zones of the keyboard.
Preview Load will only load samples across a limited range of notes, based on the “Preview-Load Note Range” setting in Browser Settings. Because of this, Preview Load can load sounds much more quickly, making it a useful feature when previewing a large number of sounds, or when you need to audition sounds quickly.
Enabling and disabling the Preview Load button will toggle between the modes.
The Lite Version button is independent of the Auto Load and Preview Load modes, and can be used in combination with either of them.
When the Lite Version button is enabled, it will apply Sample Thinning settings based on the Lite Version Zoom Options. It also provides a way to quickly browse and audition sounds in the library.
Using Lite Version together with Preview Load is the fastest way to browse and audition a large number of sounds. Using Lite Version with Preview Load disabled (in Auto Load mode) allows for faster loading of complete, ready-to-play sounds.
Using these methods together with Audition Auto-Play and MIDI Learned Browser Steppers provides an exceptionally fast and convenient way to browse the Omnisphere Library.
NOTE: If Preview Load is enabled when the Browser is closed, the setting automatically reverts to Auto Load, and the full sound is loaded.
BROWSER – Saving & Managing Sounds
BROWSER
– Saving & Managing Sounds
Omnisphere offers a very flexible way to manage custom Patches & Multis, for example, you can create custom collections of sounds organized by project or style. These can then be searched, selected or filtered using the features of the Browser.
The process of saving and managing custom Patches or Multis in Omnisphere is essentially identical, with the main difference being the locations of the user libraries that you create.
The best way to think of it is, at the top level you create Directories (or Libraries), under which you can organize your Patches into Categories.
Folders created at the top level will show up in the DIRECTORIES drop-down menu.
Subfolders created inside these will be displayed in the Category column of the Browser.
Saving Patches & Multis
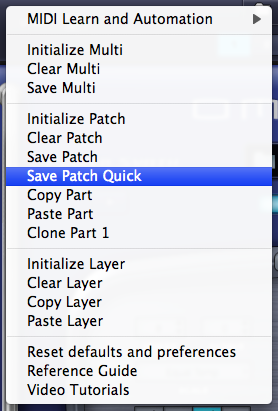
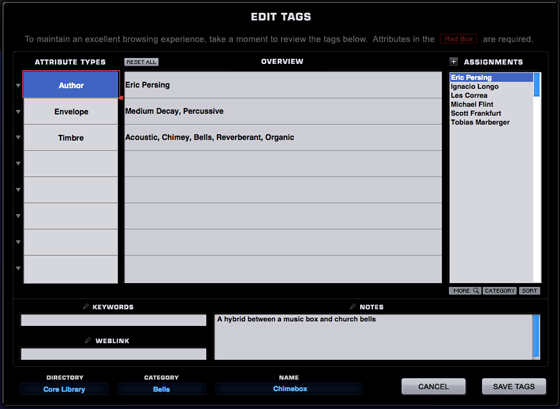
Selecting the Save Patch (or Save Multi) option from the Utility Menu will open a File Save dialogue. After naming and saving the Patch or Multi, the EDIT TAGS interface will open, allowing you to assign various Attribute Types and Assignments, add custom Assignments, and add your own Keywords and Notes to the file.
Once you have finished editing the tags, click the SAVE button to finish saving the file. You may also cancel the save process by clicking the CANCEL button.
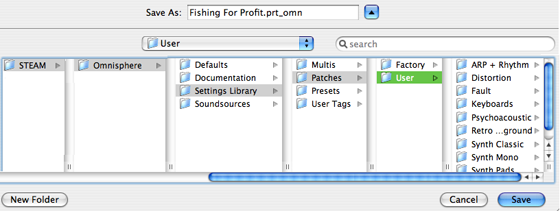
You must save Patches & Multis within the User folders, that is, you cannot save at the User folder level itself.
There is no need to press the "Refresh" button in the Browser after saving a new Patch or Multi.
NOTE: Patches & Multis must be saved into a Category folder inside the User folder. This folder can be in an existing user directory, a newly created sub-folder inside the User folder, or a new user directory.
Managing Patches & Multis
The Browser is designed to handle searching, browsing, loading and saving sounds.
User-created Patches or Multis are managed using your computer’s built-in file manager (either the Mac Finder, or the Windows Explorer). This makes it very easy to organize and manage your custom Patch and Multi Libraries, and structure them in any way that makes sense to you.
The default save location for Patches is inside a folder named "User" located at: ... /STEAM/Omnisphere/Settings Library/Patches/User.
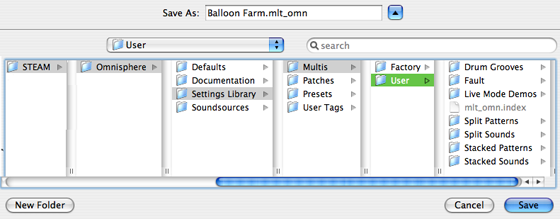
The default save location for Multis is inside a folder named "User" located at: ... /STEAM/Omnisphere/Settings Library/Multis/User.
You can create additional folders at those locations and name them whatever you like. When you create a new folder at the top level (alongside the User folder), it will show up in the DIRECTORIES drop-down menu in the respective Browser.
NOTE: When you rename or create new folders at the top level, you must re-instantiate Omnisphere, and then select the Refresh button for them to appear correctly in Omnisphere's Browser.
In order to save a Patch or Multi, you must save it into a Category sub-folder within a User folder. If there are no existing subfolders inside a User folder, you can create a new one using your system’s file manager, or by using the File Save Dialogue while saving a Patch or Multi. You can then save your Patch or Multi into the new subfolder. You can create as many sub-folders as you like, and those sub-folders will be displayed as Categories in the Category column of the Browser.
Once you have created a user library, using Omnisphere’s File Directory browsing method will allow you to browse your Patches and Multis within their folders, just as they are located on your Hard Drive.
Renaming, Relocating and Deleting Patches & Multis
To rename, relocate or delete a user-saved Patch or Multi you must use the Mac Finder or Windows Explorer to do so. Navigate to the User folder, locate the desired files there, and rename, delete or relocate them using your file manager.
BROWSER – Edit Tags
BROWSER – Edit Tags
Selecting the Edit Tags Button in the Browser
Footer opens the Tag Editor.

Omnisphere’s customizable tagging system allow
sounds to have Tags assigned to them, which categorizes sounds and makes them
searchable and filterable. Tags are based on Attributes that also can be
customized by the User.
It is not required to create Tags for custom
sounds, but it’s strongly recommended to add them, as Tags will make them
easier to find when browsing and to share with other Users.
NOTE: You won’t be able to open
the Tag Editor for a Patch or Multi unless it has already been saved to the
Library.
BROWSER - Attributes
BROWSER - Attributes
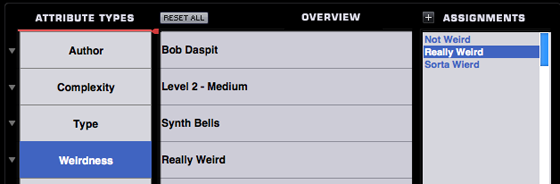
Attribute Types
All of Omnisphere’s factory sounds have at least
three Attribute Types assigned to them, and can have up to eight Attribute
Types assigned. Each Attribute Type can have multiple Attribute Assignments.
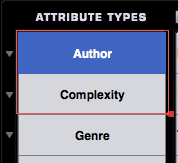
Required & Optional Types
There are two kinds of Attribute Types; Optional
and Required. Any Attribute Type
highlighted by a thin red box indicates that it is Required – meaning
that Attributes must be assigned to them. Optional Attribute Types (those without a red box) don’t require
Attributes assigned to them.
The Required indicator can be expanded or
contracted on custom sounds (Required Attributes Types in factory presets
cannot be changed, however).
Reordering Attribute Types
Attribute Types can be reordered by dragging them
vertically into another position. The first three Attribute Types will be
displayed in the Attributes columns in the Browser Filters.
Attribute Types in factory sounds are fixed, and
can’t be reorganized. Of course
any Multi or Patch can be saved as a new User Multi or Patch and the Attribute
Types can then be customized.
Create New Attribute Type
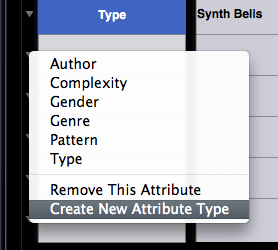
By selecting the drop-down menu next to any
Attribute Type a custom Attribute Type can be created by selecting “Create New
Attribute Type”.
Enter the name of the new Attribute Type in the
field and it will be added to existing types in the Attributes Types
column. When you create a new
Attribute Type, it’s also necessary to create new Assignments for the new
Attribute Type. Please see the section on adding Assignments for details.
Removing Attributes
The “Remove This Attribute” option is available
from the Attribute Types drop-down menu, and when selected, will do one of two
things. If the Attribute Type is a
factory Attribute Type (e.g. Author, Complexity, etc.) then all custom
Assignments will be removed, but not the Attribute Type itself. If it’s a User-created Attribute Type,
it will remove the Attribute Type and all of its Assignments.
BROWSER – Overview
BROWSER – Overview
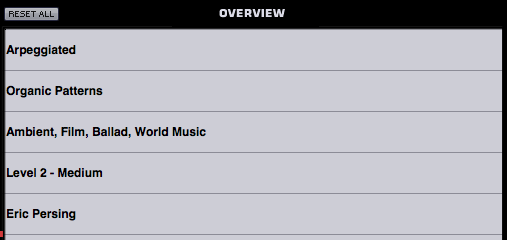
The Overview area displays all of the Assignments
assigned to each Attribute Type.
Reset All

The “Reset All” button in the Overview area will
clear all Assignments for all Attribute Types. If this button was selected accidentally, the Reset can be
undone by immediately pressing the Cancel button in the Edit Tags screen.
BROWSER – Assignments
BROWSER – Assignments
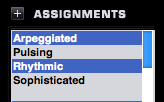
The Assignments column displays a list of Tags that can be added to an Attribute Type. These are typically descriptive words or labels, and will change depending on the Attribute Type selected. When you add an Assignment to a sound using the Assignments column, it will be added to the selected Attribute Type, and can be used later to locate the sound using the search feature of the Browser.
For example, if you add the "Arpeggiated" Assignment to a sound, and later entered "arpeggiated" into the Browser search field, the sound will appear on the filtered list.
You are not limited to a single Assignment for an Attribute Type. Multiple Assignments are permitted for all Attribute Types.
Adding Assignments
To add Assignments to an Attribute Type, first select the desired Attribute Type in the Attribute Types column. A list of Assignments related to that Attribute Type will appear in the Assignments list.
Select an Assignment to add it to the current Attribute Type. When you add an Assignment, it will be highlighted and will appear in the Attribute Type Overview. You can add any number of Assignments for a given Attribute Type.
NOTE: If you have created a custom Attribute Type, it will have no preset Assignments. You will also have to create custom Assignments in order to add Assignments to the custom Attribute Type.
Removing Assignments
To remove an Assignment from an Attribute Type, first select the desired Attribute Type in the Attribute Type column. The list of Assignments related to that Attribute Type will appear in the Assignments list, and any Assignments that have been added to that Attribute Type will be highlighted.
Select a highlighted Assignment to remove that Assignment from the Attribute Type, and it will no longer appear in the Attribute Types Overview.
Creating Custom Assignments

To create custom Assignments, you must first select an existing Attribute Type or create a custom one. Assignments can be created for both custom and factory Attribute Types.
After an Attribute Type has been selected or created, select the “+” button create a new Assignment for that Attribute Type. Enter a name for the Assignment into the text field, and press Enter/Return on your keyboard. The new Assignment will be created, and automatically added to the Attribute Type.
To create additional Assignments, press the “+” button again and repeat the process until all the desired Assignments have been created and added.
NOTE: If a custom Assignment has been created, but is not added to the Attribute Type, it will automatically be deleted after exiting the Edit Tags pane.
Assignments View

These switches determine how Assignments are viewed and sorted on the Edit Tags page.
More
Selecting this option hides the Overview area so that more Assignments can be displayed at a time.

BROWSER – Category & Sort
BROWSER – Category & Sort
Category
Selecting this option will highlight all of the
tags for the Attribute that have been used in whatever category the currently
loaded sound is in. For example,
if a Psychoacoustic sound is loaded, all of the tags for Psychoacoustic sounds
will be highlighted in blue text.
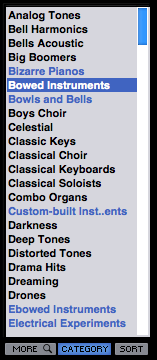
Sort
The Sort function works in two ways. First it groups all Attributes that are
in the same Category as the currently loaded sound. If the Category button is also selected, this first group
will be highlighted in blue text.
The remaining unassigned Attributes are displayed
below the top Attributes, and are sorted alphabetically.
BROWSER – Keywords, Weblink & Sort
BROWSER – Keywords, Weblink & Sort
Keywords
Keywords are descriptive words and phrases that
are outside of the scope of Attributes, but are still useful when searching and
browsing sounds. These can be more subjective and can be changed or added to
both factory and User-created Multis and Patches. You may want to add your name or comment to indicate that
it’s a favorite sound, or an artist that the sound reminds you of or a project
that the sound is associated with.
To add a Keyword, simply click the Keyword field,
and type them in. Separate each
Keyword with a comma. Select and
delete any Keywords that you wish to remove.

Weblink

This will configure the web link on the Patch
Zoom or Multi Zoom page.
This field can only contain a valid web address,
but it does not need to be a full URL. For example, Instead of “http://www.spectrasonics.net”, it can
simply be written “spectrasonics.net” and will still be considered a valid
web address.
Notes
The Notes field can contains notes about how the
sound was created, playing tips, and some suggestions for how it can be
modified.

NOTE: All of the text in the
Notes field will be checked during searches in the Browser.
BROWSER - Edit Tags Footer
BROWSER - Edit Tags Footer
The Footer displays information about the current
sound, and allows any changes to the Edit Tags to be saved or canceled.
Directory, Category and Name
These are informational displays indicating the
Directory, Category and the name of the Sound.

Cancel/Save
Any changes made in the Tag Editor can be saved
or canceled by selecting the appropriate button.

NOTE: Saving the Tags also saves the Patch or Multi and any
modifications that have been made to it.
BROWSER - Settings
BROWSER - Settings

Selecting the Settings Button will open the
Browser Settings Zoom View. Settings are saved across sessions, and are
restored the next time you load Omnisphere.
NOTE: Audition Auto Play will
reset each time Omnisphere is loaded.

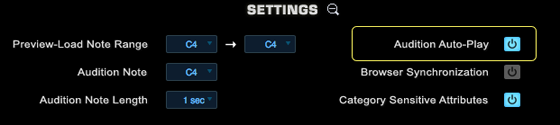
Preview/Load Note Range
When Preview Load is enabled in the Browser, this
function will determine what note range is loaded.
Audition Note
Determines the pitch of the single note that will
be played when sounds are auditioned while Audition Auto-Play is enabled.
Range C-1 to B8
NOTE: This setting also affects
the pitch of the Audition Buttons in the Browser and on the Part pages.
Audition Note Length
When Audition Auto-Play is enabled and a sound is
selected, it will play for a limited amount of time. This setting determines
how long the auditioned sound will play.
Range 1 to 9 seconds
Audition Auto Play
When enabled, every time a Multi, Patch or
Soundsource is selected in the Browser, the Audition Note will sound for the
length of time determined by the Audition Note Length.
This is useful for browsing through sounds using
the Browser Steppers, and is especially useful when combined with Preview Load,
as it allows rapid loading and auditioning of multiple sounds.
Browser Synchronization
When enabled, the Browser Filters will retain
their current Attribute selections when another Part or Layer is selected. This
is very useful when browsing a large number of Soundsources because the
Attribute selections for Layer A and Layer B will remain the same as you move
between Layers and across different Parts.
For example, you need to create a Multi and you
only want to check Soundsources in the “Ambience” Category. After setting the first Part to view
only the Ambience category, Browser Synchronization will make it so all the
subsequent Parts will open with the same Ambience category selected.
Category Sensitive Attributes
If Category Sensitive Attributes is enabled (the
default state), then the different Attributes columns may change when a new
Category is selected. This ensures that the context of the Attributes matches
the Category. If this setting is disabled, then the Attributes columns will
remain static when you change Categories.
BROWSER - Omnisphere Library Integration
BROWSER - Omnisphere Library Integration
One of the great features of Omnisphere is the Omnisphere Library Integration feature.
Beginning with Omnisphere, Trilian Soundsources, Patches and Multis can be conveniently loaded directly within Omnisphere for further synthesis manipulation or just convenience of use.
If you have both Omnisphere and Trilian installed, your Trilian libraries will appear in the Omnisphere Browsers and Browser DIRECTORY menu along with your other Omnisphere libraries.
You can then load your Trilian sounds into Omnisphere just like you would any other Omnisphere sound!
NOTE: Trilian User Patches and User Multis will not appear in the Omnisphere library. You can still use Trilian to open those, or simply recreate them in Omnisphere using Trilian Soundsources or Patches, and then save them as Omnisphere Patches or Multis.
BROWSER - Omnisphere Library Integration - Setup
BROWSER - Omnisphere Library Integration - Setup
In order to enable Omnisphere Library Integration, you must first have a full install of Trilian, registered and authorized, on your system.
Next, install and authorize Omnisphere. If you already have Omnisphere on your system, you will be asked to reauthorize it after you have installed and registered Trilian.
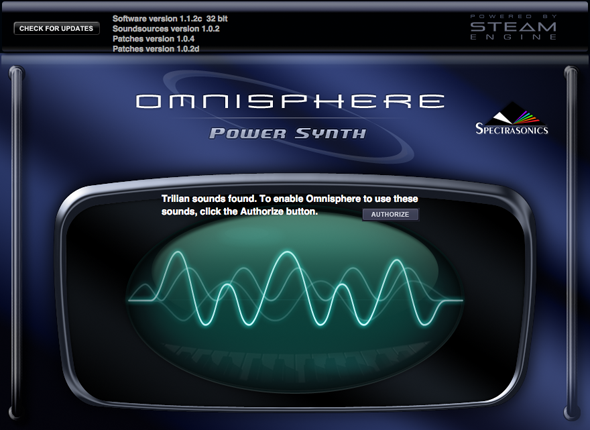
When you first launch Omnisphere, you will see the following splash screen. Click the Authorize button, and follow the normal steps for authorization.
NOTE: You must generate a new Response Code using your user account at the Spectrasonics website.
After (re)authorizing Omnisphere, the Trilian libraries will appear in your Omnisphere Browsers.
Troubleshooting
If you are loading Trilian sounds into Omnisphere, and see the following error message, it indicates that you haven’t successfully registered and authorized Trilian.
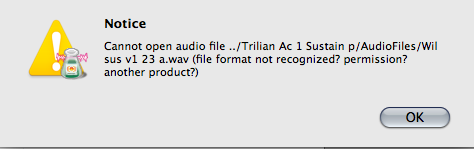
Please register and authorize Trilian before trying to load Trilian sounds in Omnisphere.
BROWSER - Omnisphere Library Integration - Using Trilian Sounds
BROWSER - Omnisphere Library Integration - Using Trilian Sounds
Depending on your session needs, the Omnisphere Library Integration feature offers the ability to apply Omnisphere’s powerful synthesis tools to Trilian sounds, combine Omnisphere and Trilian sounds in interesting ways, or to simply conserve system resources by including your Trilian Parts alongside your Omnisphere Parts in a single Omnisphere instance.
There are various useful ways that you can combine Omnisphere and Trilian Soundsources and Patches within Omnisphere to open up a tremendous variety of sounds and performance applications.
For performances, you could use Stack Mode or Live Mode to create useful combinations of Trilian basses and Omnisphere synth sounds. Try using keyboard or velocity splits, layering, or apply Part switching to a Multi in Live Mode.
In this Stack Mode example, you can create a Multi in Omnisphere that contains a number of Omnisphere Parts, and one or more Trilian bass Parts. In Stack Mode, create keyboard splits that trigger the bass Parts with lower notes, and Omnisphere synth Parts with the higher notes. You can experiment with layers and crossfades too!

Using the same Multi in Live Mode, you can instantly switch between Trilian and Omnisphere parts, or instantly layer them. For example, this would allow you to play a solo bass phrase in one passage, and then instantly add a doubled guitar or strings sound to the bass for another.

There are endless sound design possibilities as well. For example, if you apply Omnisphere’s synthesis power to Trilian Synth Bass waveforms, you can take those sounds much further to create very unique bass timbres!
In another example, you could load Acoustic Bass samples from Trilian, and combine them with Psychoacoustic samples from Omnisphere, creating new and interesting hybrid sounds!