GETTING STARTED
Welcome To Omnisphere!
GETTING STARTED
Welcome To Omnisphere!
GETTING STARTED - Quickstart
This Quickstart provides an overview of the essential things you will need to know in order to get started using Omnisphere.
• Omnisphere is a software instrument plug-in, and requires host software in order to run
• Omnisphere can be a memory intensive instrument, especially with Multis loaded. A system with plenty of RAM will greatly enhance performance. Be sure and check out the Concepts: Performance Optimization chapter.
1. Install Omnisphere
Installing
will take 3 ~ 4 hours, and will require 50 GB of free hard drive space
2. Authorize the Plug-In
Authorization can be done immediately from any computer connected to the Internet
3. Get Everything Updated
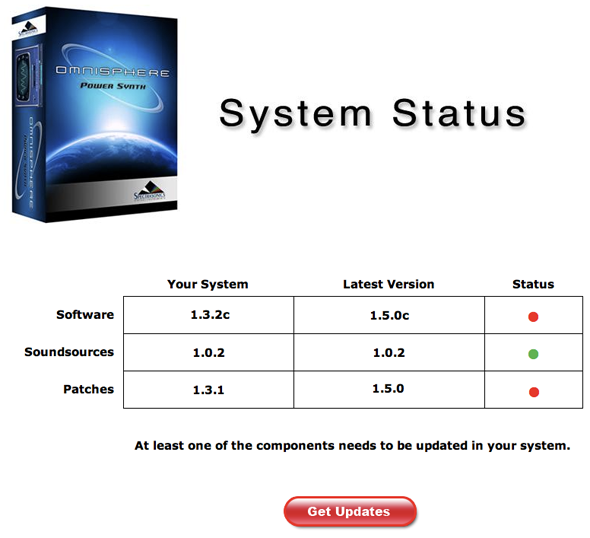
Make sure you have the latest versions of the Software, Soundsources and Patches:
• Open Omnisphere and click on the Spectrasonics logo• Select the button labeled "Check for Updates" to open the System Status page
• Status indicators in red mean that an update is necessary. Click the “Get Updates” button to download them.
• After installing the updates, Omnisphere is ready to go!
NOTE: Be sure to quit your host software before installing
the downloaded updates.
4. Use Omnisphere Multitimbrally
• Omnisphere is a multi-timbral instrument, so you can use a single instance to load and play eight different sounds on different MIDI channels.
• Setup your host software for multi-timbral operation
5. Loading Sounds
There are three types of sound libraries in Omnisphere:
Patches, Multis and Soundsources
To load a Patch:
• Select a Part Number Button in the Header
• Click on the Patch Name Display just below the large Omnisphere title
• The Patch Browser will open, allowing you to select and load Patches
To load a Multi:
• Click the Multi Name Display in the Omnisphere Header
• The Multi Browser will open, allowing you to select and load Multis
To load a raw Soundsource:
• Select “Clear Part” from the Utility Menu in the Header
• Click the Soundsource Name Display below Layer A
• The Soundsource Browser will open, allowing you to select and load Soundsources.
6. Watch essential Video Tutorials
We have produced quite a few online video tutorials for Omnisphere, and we encourage you to view and download them from our support website.
To begin, please view the following essential videos:
These videos will provide the minimum information every Omnisphere user needs to start working with Omnisphere.
7. Explore and Learn
For more in-depth information, watch additional tutorials and explore out this Reference Guide - which is the primary manual for Omnisphere. This guide can be viewed on any computer and can be printed and searched for easy access to find the information you need.
• If you’re new to synthesis, we recommend starting with the chapters on Concepts, The Mixer, Browsers, Main Pages, Arpeggiator and Live Mode.• If you have some experience with synthesis, be sure to check out the chapters on The FX Rack, Automation & MIDI Learn, The Edit Page and Stack Mode.
• Experienced synthesists can go in-depth with zooming concepts that are covered in the chapters on Modulation, Oscillators, Filters, LFOs, and Envelopes.
8. Support Resources
Online resources are available that can answer most technical questions. Please login and visit our Knowledge Base at: http://support.spectrasonics.net
9. Have Fun!
Enjoy using Omnisphere and we hope you make some great music with it!
-The Spectrasonics Team
GETTING STARTED - System Requirements
SYSTEM REQUIREMENTS FOR ALL USERS:
• 2.4 GHz or higher processor (Intel Core2Duo or higher recommended)
• 2GB RAM minimum, 4GB or more recommended
• Dual Layer compatible DVD-ROM drive
• 50GB of free hard drive space
Mac Recommendations:
• OSX 10.5 Leopard or higher
• AU, VST 2.4 or higher, RTAS capable host software
• Audio Unit plugin requires host support for "Cocoa" based plugins
• Native 64-bit and 32-bit on OSX
• 6GB of RAM (or more) if using the Sample File Server
Windows Recommendations:
• VST 2.4 or higher, RTAS capable host software
• Microsoft Windows 7/Vista compatible
• Native 64-bit and 32-bit on Windows
GETTING STARTED - Mac OS-X Installation on the Startup Drive
Follow this set of instructions to install the Omnisphere large sound library files onto your startup hard drive. You need almost 50GB of free space available on your startup hard drive in order to continue. If you want to install Omnisphere to an external hard drive, please skip to the MAC OSX - CUSTOM INSTALLATION set of instructions here.
NOTE: These screenshots are taken in OSX Leopard. Installation on OSX Tiger will look slightly different.
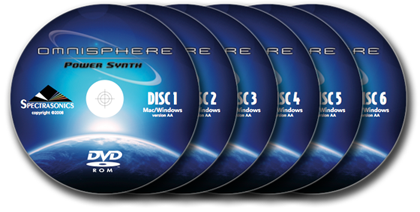
INSTALLING DISC 1
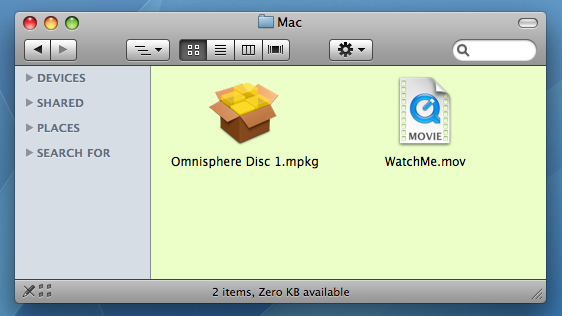
1. After inserting Omnisphere Disc 1 into the computer, open the disc to reveal its contents from the Desktop.
2. Open the Mac folder, then double-click "Omnisphere Disc 1" to begin the installation of Omnisphere.
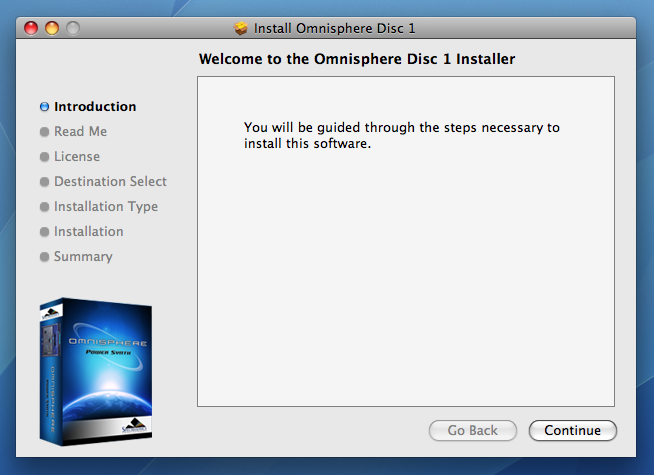
3. Click "Continue".
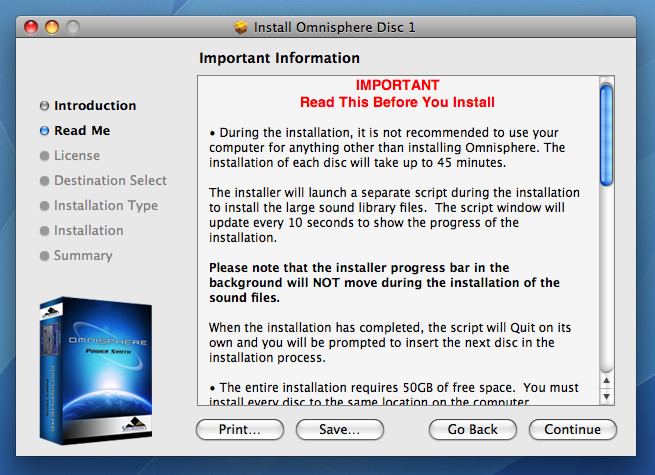
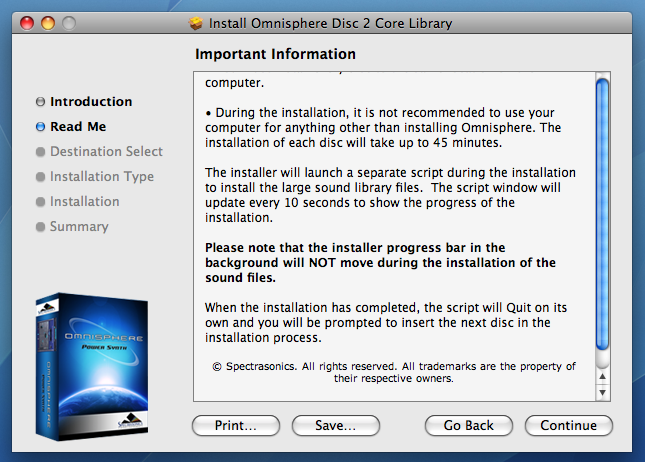
4. Read this important information about the installation process before you install. Click "Continue" to proceed.
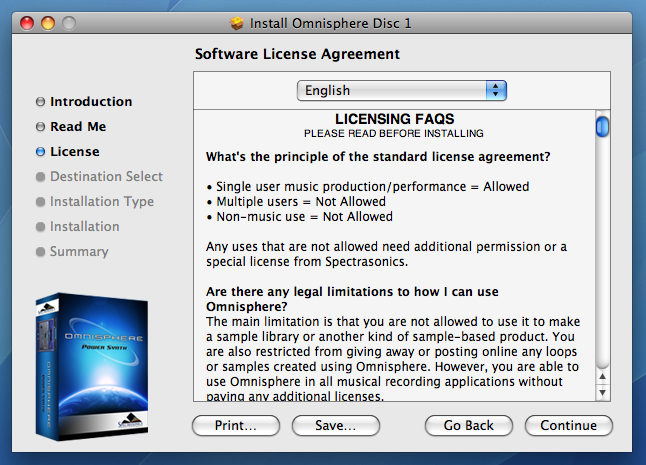
5. After reading through the licensing FAQs, click "Continue".
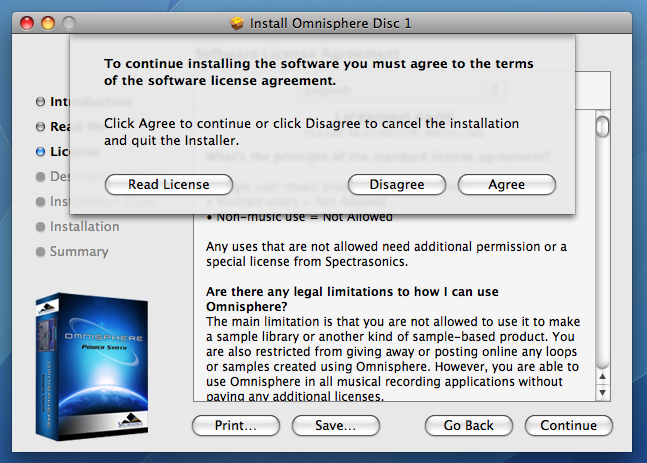
6. You will then be prompted by another window. Choose "Agree" if you fully understand the licensing agreement to continue.
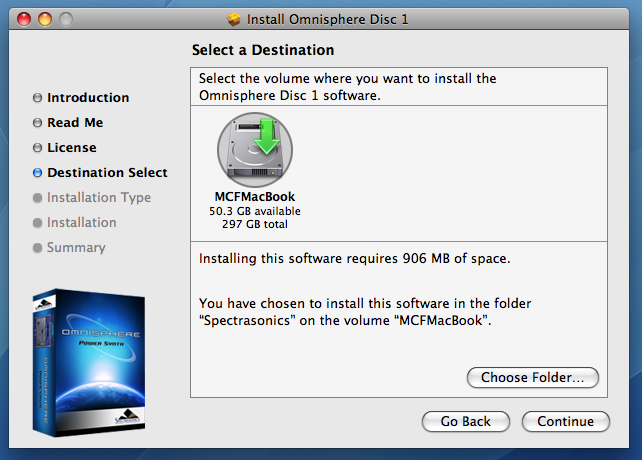
7. Simply click “Install” to agree to begin installing Omnisphere to the startup hard drive. This is the default installation. Remember there needs to be almost 50GB of free space available on the startup drive in order to completely install Omnisphere.
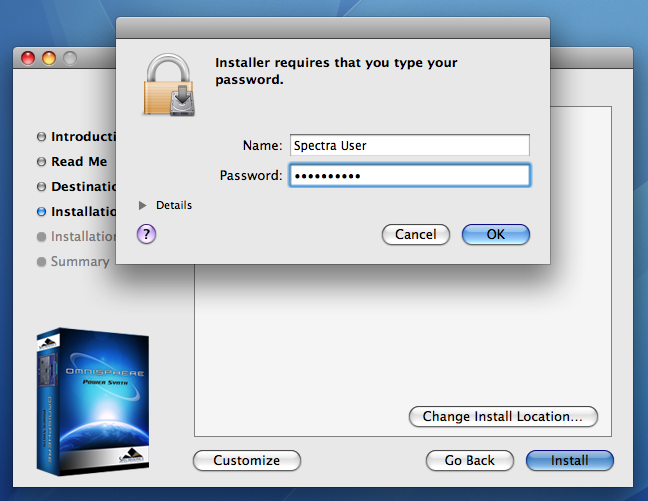
8. Enter the password for your Mac OSX user account to continue the installation.

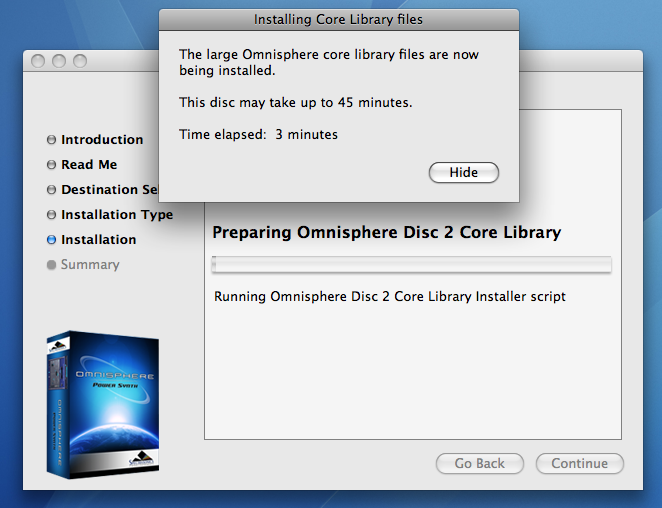
9. The disc will now install. The installation of each disc will take up to 45 minutes. The installer will launch a separate script during the installation to install the large sound library files. The script window will update every 10 seconds to show the progress of the installation.
NOTE: The installer progress bar in the background will not move during the installation of the sound files. This is normal and installation progress will be shown via the “Time Elapsed” area of the script window.
During the installation, it is not recommended to use your computer for anything other than installing Omnisphere. The script window will beep and bounce in the dock if other applications are opened. This is because the script window wants to be the top window on screen at all times. Doing other things while installing probably won’t jeopardize the installation, but you should be aware of how the installer script behaves. Selecting the “Hide” button will cause the script window to vanish until the installation completes.
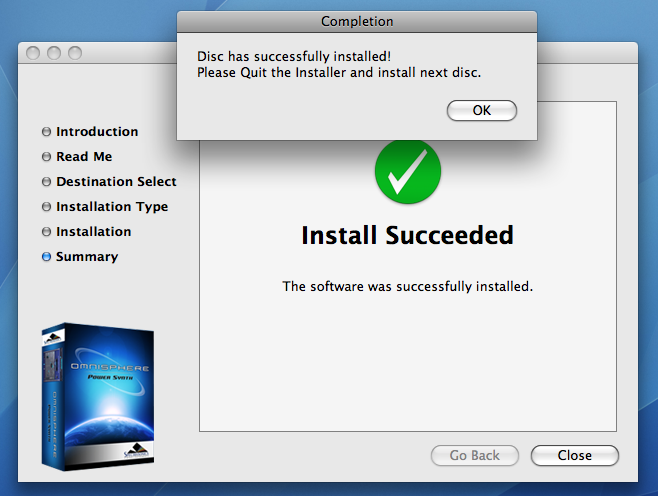
10. Once the disc has finished installing, click “OK”, then “Close”, and continue by installing the next disc.

INSTALLING DISC 2 - DISC 6
The following instructions apply to Disc 2 through 6.
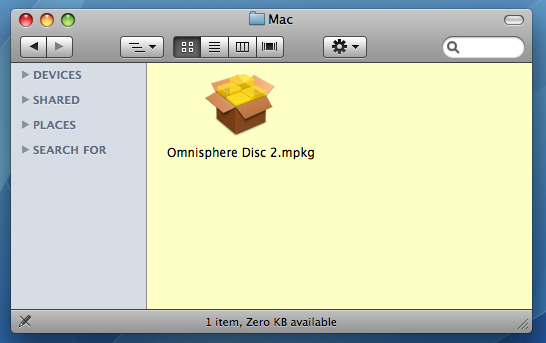
11. After inserting Omnisphere Disc 2 into the computer, open the disc to reveal its contents from the Desktop.
12. Open the Mac folder, then double-click "Omnisphere Disc 2" to begin the installation of Omnisphere.
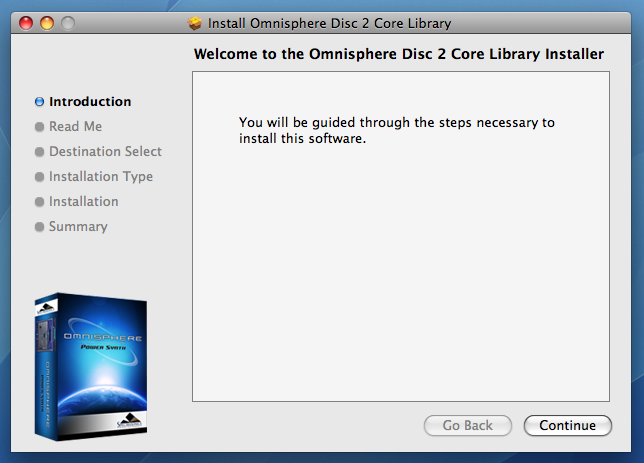
13. Click "Continue".
14. Read this important information about the installation process before you install. Click "Continue" to proceed.
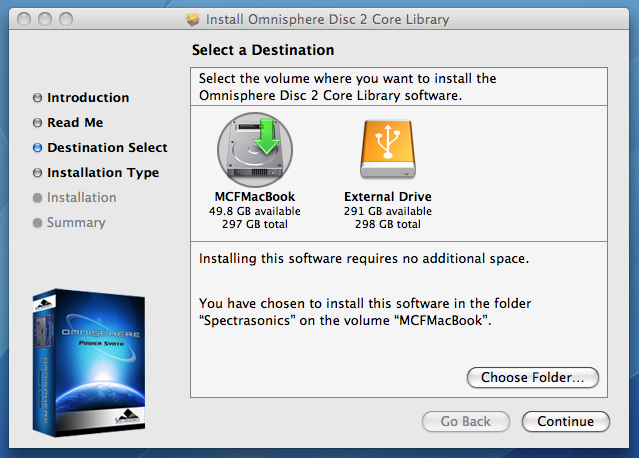
15. Now choose the same installation destination as you did for Disc 1. Simply click “Install” to continue installing the large sound library files to the startup hard drive.
16. Enter the password for your Mac OSX user account to continue the installation.
17. The disc will now install. The installation of each disc will take up to 45 minutes. The installer will launch a separate script during the installation to install the large sound library files. The script window will update every 10 seconds to show the progress of the installation.
NOTE: The installer progress bar in the background will not move during the installation of the sound files. This is normal and installation progress will be shown via the “Time Elapsed” area of the script window.
During the installation, it is not recommended to use your computer for anything other than installing Omnisphere. The script window will beep and bounce in the dock if other applications are opened. This is because the script window wants to be the top window on screen at all times. Doing other things while installing probably won’t jeopardize the installation, but you should be aware of how the installer script behaves. Selecting the “Hide” button will cause the script window to vanish until the installation completes.

18. Once the disc has completed installing, click “OK”, then “Close”, and continue by installing Disc 3 through 6 exactly as was just done for Disc 2. After installing Disc 6, the installation will be complete.
Once the installation of all six discs is complete, it’s now time to open
Omnisphere in your host sequencer and authorize it.
Please consult the Authorization section for assistance with authorizing Omnisphere.
GETTING STARTED - Mac OS-X Installation to an External Drive
Follow this set of instructions to install the Omnisphere large sound library files onto an external hard drive. The Omnisphere plug-in files will be installed to the startup hard drive. You need 50GB of free space available on your external hard drive in order to continue.
NOTE: View the WatchMe movie on Disc 1 inside of the Mac folder for a video walkthrough of the install process.
NOTE: These screenshots are taken in OSX Leopard. Installation on OSX Tiger will look slightly different.
INSTALLING DISC 1
1. After inserting Omnisphere Disc 1 into the computer, open the disc to reveal its contents from the Desktop.
2. Open the Mac folder and then double-click "Omnisphere Disc 1" to begin the installation of Omnisphere.
3. Click "Continue".
4. Read this important information about the installation process before you install. Click "Continue" to proceed.
5. After reading through the licensing FAQs, click "Continue".
6. You will then be prompted by another window. Choose "Agree" if you fully understand the licensing agreement to continue.
7. Click “Change Install Location...” to select a custom installation location for the large sound library files of Omnisphere.

Now select an external drive for the installation. Remember that the drive needs 50GB of free space for the entire installation. After selecting the drive, select
“Choose Folder”.
Create or select a folder on the external drive as the installation destination. In this example, a folder named “Spectrasonics Instruments” has been created and selected as the installation destination. After selecting a folder, click “Choose”.
Then click “Continue” followed by “Install”.
.
8. Enter the password for your Mac OSX user account to continue the installation.
9. The disc will now install. The installation of each disc will take up to 45 minutes. The installer will launch a separate script during the installation to install the large sound library files. The script window will update every 10 seconds to show the progress of the installation.
NOTE: The installer progress bar in the background will not move during the installation of the sound files. This is normal and installation progress will be shown via the “Time Elapsed” area of the script window.
During the installation, it is not recommended to use your computer for anything other than installing Omnisphere. The script window will beep and bounce in the dock if other applications are opened. This is because the script window wants to be the top window on screen at all times. Doing other things while installing probably won’t jeopardize the installation, but you should be aware of how the installer script behaves. Selecting the “Hide” button will cause the script window to vanish until the installation completes.
10. Once the disc has finished installing, click “OK”, then “Close”, and continue by installing the next disc.
INSTALLING DISC 2 - DISC 6
The following instructions apply to Disc 2 through Disc 6.
11. After inserting Omnisphere Disc 2 into the computer, open the disc to reveal its contents from the Desktop.
12. Open the Mac folder, then double-click "Omnisphere Disc 2" to begin the installation of Omnisphere.
13. Click "Continue".
14. Read this important information about the installation process before you install. Click "Continue" to proceed.
15. Now choose the same installation destination as you did for Disc 1. Click “Change Install Location...”

Select the same external hard drive as you did in Disc 1 and click “Choose Folder”.

16. Enter the password for your Mac OSX user account to continue the installation.
17. The disc will now install. The installation of each disc will take up to 45 minutes. The installer will launch a separate script during the installation to install the large sound library files. The script window will update every 10 seconds to show the progress of the installation.
NOTE: The installer progress bar in the background will not move during the installation of the sound files. This is normal and installation progress will be shown via the “Time Elapsed” area of the script window.
During the installation, it is not recommended to use your computer for anything other than installing Omnisphere. The script window will beep and bounce in the dock if other applications are opened. This is because the script window wants to be the top window on screen at all times. Doing other things while installing probably won’t jeopardize the installation, but you should be aware of how the installer script behaves. Selecting the “Hide” button will cause the script window to vanish until the installation completes.
Select the same folder as was done for Disc 1, and click “Choose”. Then click “Continue” followed by “Install”.
18. Once the disc has completed installing, click “OK”, then “Close”, and continue by installing Disc 3 through 6 exactly as was just done for Disc 2. After installing Disc 6, the installation will be complete.

Once the installation of all six discs is complete, it’s now time to open
Omnisphere in your host sequencer and authorize it.
Please consult the Authorization section for assistance with authorizing Omnisphere.
GETTING STARTED - Windows Installation
INSTALLING DISC 1
1. Insert Omnisphere Disc 1 into the computer ’s optical disc drive. Double-click “My Computer”. Double-click the disc drive to view its contents and open the folder called “Windows”.
2. Double-click setup.exe to begin the installation of Omnisphere.

3. After reading the Introduction, click "Next".
4. Read through the licensing FAQs and license agreement. If you agree to the terms of the license agreement, click "I accept the agreement". Then click “Next”.

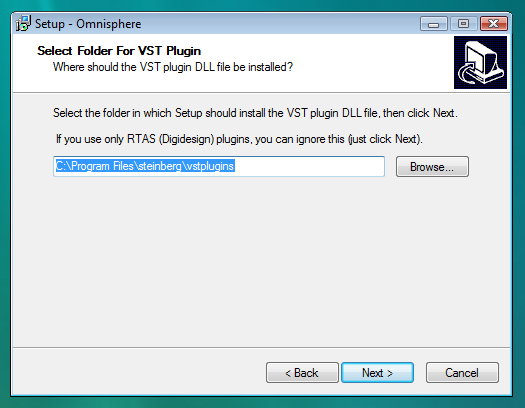
5. You will now need to select an installation destination for the VST plug-in version of Omnisphere on the computer. The default location is:
C:\Program Files\Steinberg\Vstplugins
If you would like to change where the plug-in is installed, click “Browse” and select an alternated installation destination. The RTAS version of Omnisphere is automatically installed during the installation for all users to:
C:\Program Files\Common Files\Digidesign\DAE\Plug-ins
NOTE: If you only use Pro Tools, use the default installation destination for the VST plug-in (C:\Program Files\Steinberg\Vstplugins). Click “Next” to continue.
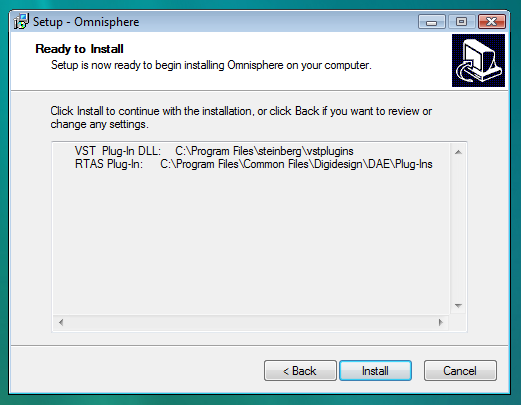
6. Verify that the VST plug-in installation destination choice is correct and then click “Install”.
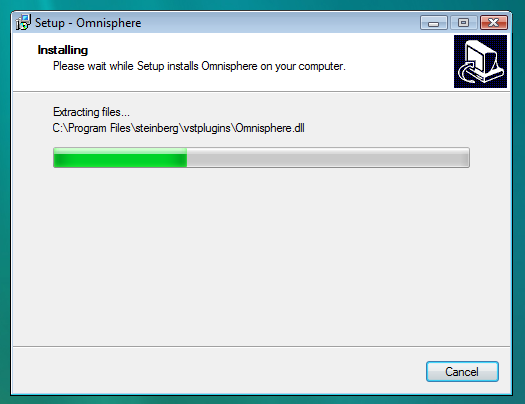
7. The Omnisphere plug-ins will now be installed.
8. Once the plug-in installation has completed, it will now be time to install the Omnisphere Core Library files. Click “Next to continue
9. Now select where to install the Omnisphere large sound library files. You will need 50GB of free hard drive space to install the data on all 6 discs. You must install every disc to the same location on your computer. The default installation destination is to the startup hard drive. If you would like to choose a custom install location to an external hard drive, select “Browse” and select a new installation location. That same location will need to be selected when installing the following discs. When ready to proceed, click “Next”.
NOTE: FAT32 formatted drives cannot be used to store the STEAM data (because some STEAM files are larger than 4 GB). If you are not sure, open Windows Explorer, and find the drive (for example, "D:\") then right-click on the drive and selecte "Properties", and the properties window will display either NTFS (acceptable for STEAM) or FAT32 (not acceptable).
10. Verify the install destination for the Omnisphere Core Library files then choose “Install”.
11. The Omnisphere Core Library files will now be installed. Please be patient as this process can take up to 45 minutes. When the installation has completed, please insert the next disc in the installation process.
INSTALLING DISC 2 - 6
The following instructions apply to Disc 2 through 6.
12. Insert Omnisphere Disc 2 into the computer ’s optical disc drive. Double click “My Computer”. Double-click the disc drive to view its contents and open the folder called “Windows”.
13. Double-click setup.exe to begin the installation of Omnisphere.
14. After reading the Introduction, click "Next".
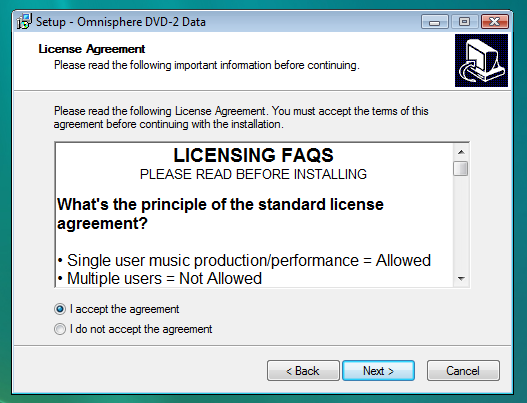
15. Read through the licensing FAQs and license agreement. If you agree to terms of the license agreement, click "I accept the agreement". Then click “Next”.
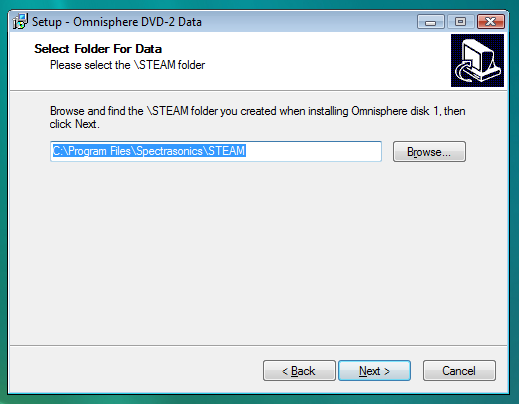
16. Now select the same installation destination (the STEAM folder) for the Omnisphere large sound library files as was selected for Disc 1. You cannot install the discs to different installation destinations. Then click “Next”.
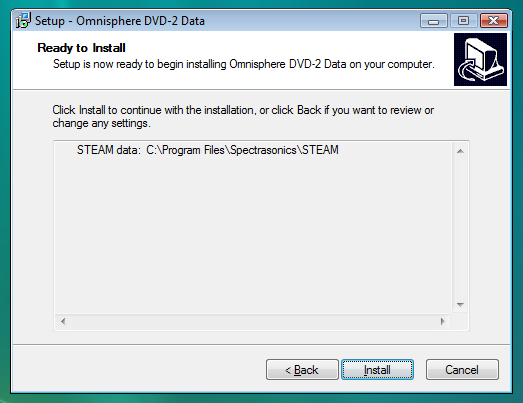
17. Verify the installation destination matches the same installation destination from Disc 1 for the Omnisphere large sound library files then click “Install”.
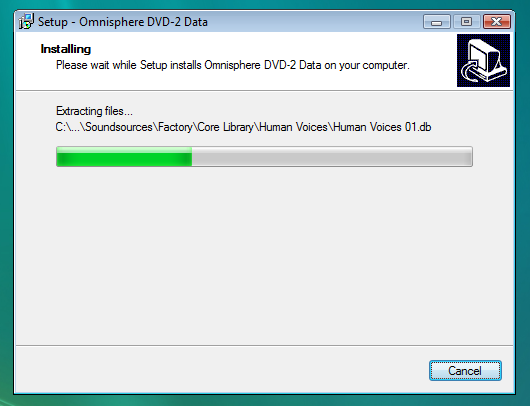
18. The Omnisphere Core Library files will now be installed. Please be patient as this process can take up to 45 minutes. When the installation has completed, please insert the next disc in the installation process. Install Disc 3 through 6 just as Disc 2 was installed.
When all six discs have been installed, the installation is complete! It’s now time to open Omnisphere in your host sequencer and authorize it.
Please consult the Authorization section for assistance with authorizing Omnisphere.
GETTING STARTED - Authorization

Omnisphere authorization can be done immediately from any computer connected to the Internet. There is a 4-day demo period from the time you first open the plug-in to authorize it if immediate Internet access is not available.
After opening Omnisphere in your host sequencer, an authorization window will appear. A Challenge Code will be provided. You will need this Challenge Code along with your Serial Number to complete the online Authorization process.
GETTING STARTED - Authorizing On A Computer Connected To The Internet
The music computer must be connected to the internet while following these instructions.
1. After instantiating Omnisphere into your sequencer, click the Omnisphere splash screen.
You will now see the Omnisphere Authorization System window:
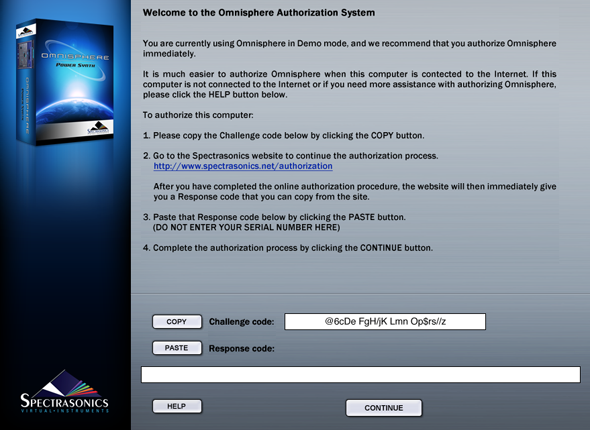
2. Click the COPY button to copy the challenge code. Log in to the Spectrasonics website with your User Account name and password
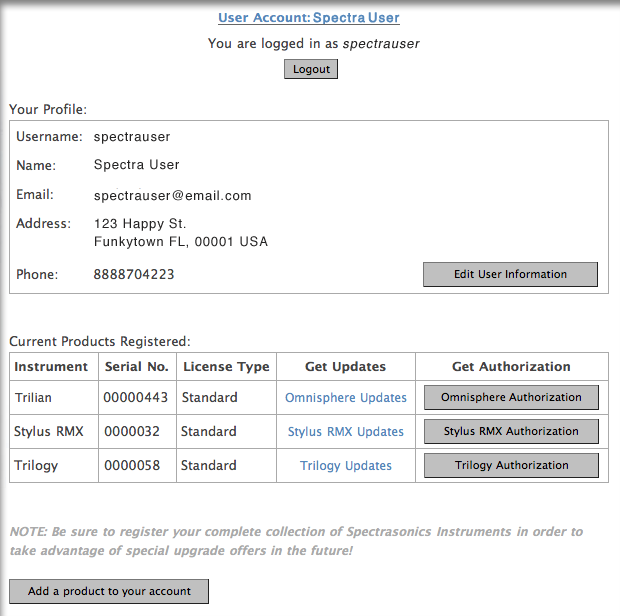
You will be taken to your User Account page. If you don't yet have a User Account, you can create one. For further assistance, check out the tutorial video
3. If this is your first authorization of Omnisphere, you'll need to add it to your account by pressing the "Add a product to your account" button under the Registered Products table.
4. Fill out all of your personal information on this page. Select Omnisphere as your product. When finished, click "Next" at the bottom of the page.
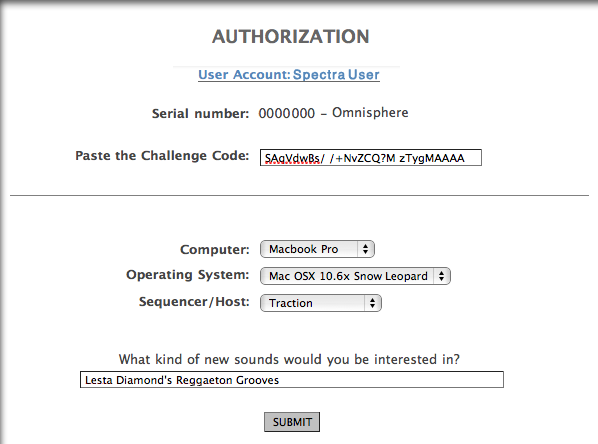
5. You'll then paste your Challenge code in the field on the Authorization page. Please enter the details about your Computer as well, as it will be necessary if you require tech support.
6. You'll then receive a Response Code, which you'll select with your cursor and copy (Control-C on Windows or Command-C on Mac):
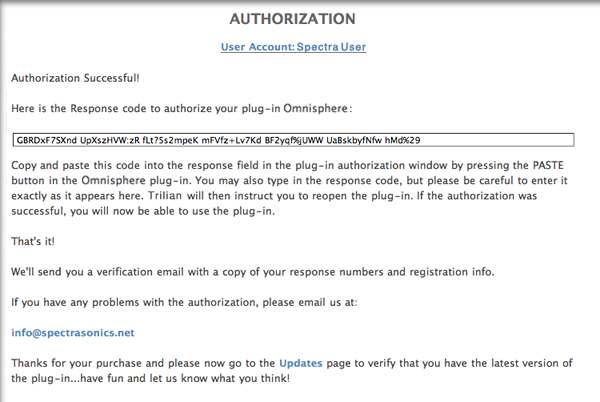
7. Return back to Omnisphere. Click PASTE and the Response Code will now be displayed in Omnisphere.
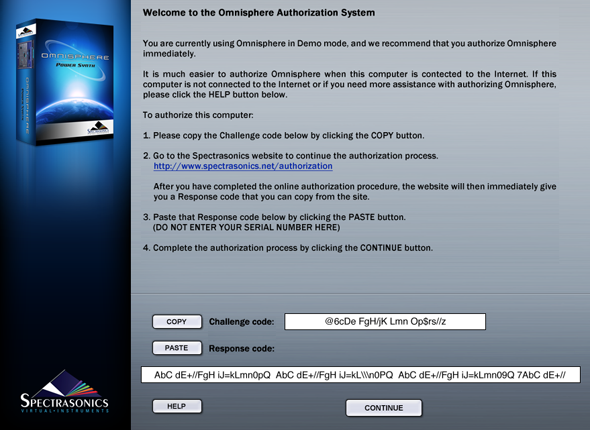
8. Click CONTINUE
9. Now remove Omnisphere from your host sequencer.
10. Re-insert Omnisphere into your host.
Omnisphere will now be authorized and fully functional.
GETTING STARTED - Authorizing On A Computer NOT Connected To The Internet
If your computer is not connected to the Internet, please follow these instructions for authorizing Omnisphere. You will need a flash drive, hard drive, or blank CD/DVD available for use when following these instructions.
1.After instantiating Omnisphere into your sequencer, click the Omnisphere splash screen:
2. Click the COPY button to copy the challenge code.
3. Open a text editor application (such as Text Edit (Mac), Notepad / Wordpad (PC)). Paste into a blank new document. On a Mac, hold COMMAND and press 'V'. On a PC, hold CTRL and press 'V'. The challenge code will now appear in the document. Save the document as a Rich Text File (RTF) with a filename of your choice.
4. Move the RTF file to a flash drive, hard drive, or burn it to a blank CD/DVD. You will need to transport this document over to a computer that has an Internet connection. Flash drives are recommended because they are cheap and quickly move files between computers.
5. Open the RTF file on a computer with an Internet connection. Highlight the entire challenge code in the document and Copy it. On a Mac, hold COMMAND and press 'C'. On a PC, hold CTRL and press 'C'.
6. Log in to the Spectrasonics website with your User Account name and password
You will be taken to your User Account page. If you don't yet have a User Account, you can create one. For further assistance, check out the tutorial video.
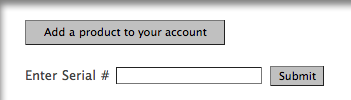
7. If this is your first authorization of Omnisphere, you'll need to add it to your account by pressing the "Add a product to your account" button under the Registered Products table.
8. Enter your Omnisphere serial number in the box that appears below the button:
9. You'll then paste your Challenge code in the field on the Authorization page. Please enter the details about your Computer as well, as it will be necessary if you require tech support.
10. You'll then receive a Response Code, which you'll select with your cursor and copy (Control-C on Windows or Command-C on Mac):
11. Open up a blank new document in a text editor application. Paste into the document. The Response Code will now appear in the document. Save the document as a Rich Text File (RTF) with a filename of your choice.
12. Move the RTF file to a flash drive, hard drive, or burn it to a blank CD/DVD. You will need to transport this document back over to the music computer.
13. Open up the RTF file which contains the Response Code on your music computer. Select and highlight the Response Code in the document and Copy it. On a Mac, hold COMMAND and press 'C'. On a PC, hold CTRL and press 'C'.
14. Return back to Omnisphere. Click PASTE and the Response Code will now be displayed in Omnisphere.
14. Click CONTINUE.
15. Now remove Omnisphere from your host sequencer.
16. Re-insert Omnisphere into your host. Omnisphere will now be authorized and fully functional.
GETTING STARTED - Demo Mode
We recommend that you authorize immediately, but if you would rather authorize later, then you may activate the Demo period, which will last 4 days.
This can be useful if you want to try Omnisphere temporarily on a system to test its performance. In Demo mode, saving is disabled and audio artifacts will begin to appear in the signal after a period of time (loading of songs and patches will work though). You will still be able to authorize during or after the demo period.
After pressing the DEMO MODE button you will see this screen:
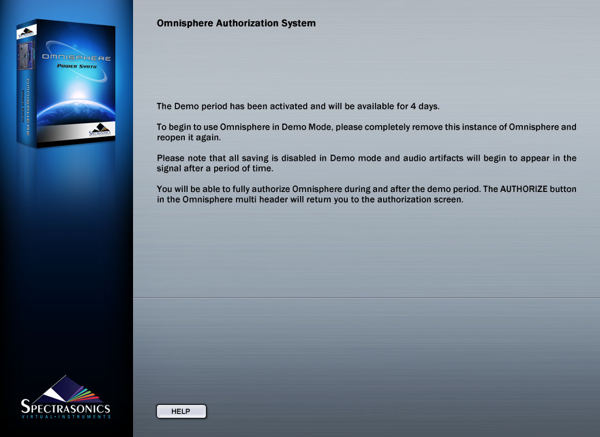
Go back to the host software and completely remove this instance of the Omnisphere plug-in. Reopen it and you will be in Demo Mode. It will say Demo Mode at the top of the plug-in and there will be an Authorize button below the Utility Menu button.

If you want to authorize during the demo period, press the Authorize button, and you will see the Omnisphere Authorization System window. After the 4-day demo period has finished, you will be sent back to the Authorization System Window.
GETTING STARTED – Authorization Troubleshooting
If you are returned to the Welcome to the Omnisphere Authorization System page or the demo mode version of Omnisphere after reopening Omnisphere, then that means the plug-in did not accept the response code and it may have been incorrectly entered. You can check your response code by looking at the email that was sent to you after you registered. Remember that the codes are case sensitive. Try authorizing again with the instructions given in the Authorizing section. Make sure you are entering the response code given by the website and NOT the serial number from your user guide.
While in demo mode, if you accidentally press the Authorize button, simply close the interface window and reopen it.
NOTE: If you need further assistance, please contact technical support at info@spectrasonics.net
GETTING STARTED – Moving The STEAM Directory
After installation, you can easily move the large STEAM directory containing all the sound files to a secondary drive if you wish to free up space on your original installation drive.
WINDOWS - MOVING THE STEAM DIRECTORY AFTER INSTALLATION
• Drag or copy the STEAM folder from your installation drive (C:\Program Files\Spectrasonics) to the hard drive location of your choice.
This can be another drive partition, a secondary internal drive or an external hard drive such as a Firewire or USB2 hard drive, etc.
• Next, right-click the SAGE folder in the new location to create a “Shortcut To STEAM”.
• Next, copy the shortcut to C:\Program Files\Spectrasonics.
• Finally, make certain to remove the “Shortcut To ” from the name (including removing the spaces), leaving the folder shortcut named STEAM
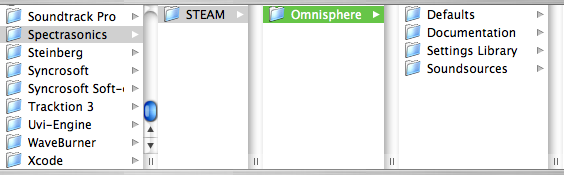
MAC OSX - MOVING THE STEAM DIRECTORY AFTER INSTALLATION
• Drag or copy the STEAM folder from your installation drive
(For Example: Macintosh HD/Library/Application Support/Spectrasonics)
to the hard drive location of your choice. This can be another drive partition, a secondary internal drive or an external hard drive such as a Firewire or USB2 hard drive, etc.
• Next, hold (Apple key and Option key) on the keyboard, click and drag the STEAM folder to the desktop to create an alias of the folder named STEAM.
• Next, move the STEAM alias from the desktop to Macintosh HD/Users/Username/Library/Application Support/Spectrasonics
GETTING STARTED - Video Tutorials
There are hours of informative online video tutorials available to registered Spectrasonics users on the Spectrasonics website.
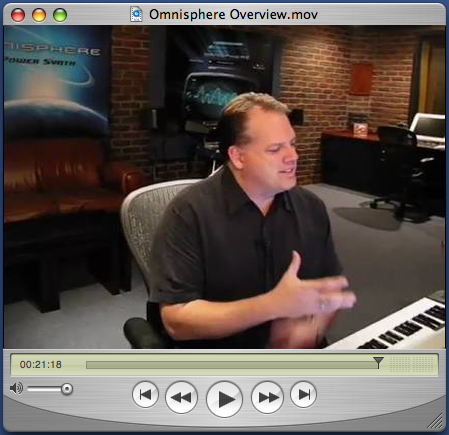
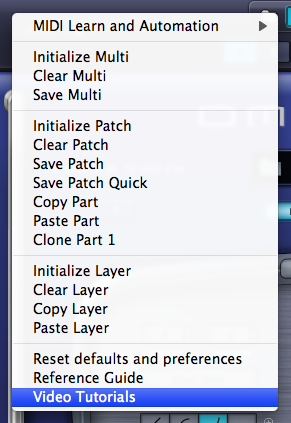
Selecting “Video Tutorials” from the Utility Menu provides convenient access to all available tutorials. Tutorial Videos are located online in the Main Videoarea of the site. You can play them directly or download them to your system for later viewing.
You will also find links to relevant video tutorials throughout this Reference Guide.
Spectrasonics is always adding additional videos, so check back from time to time to check out the new ones.
GETTING STARTED - Using Omnisphere Stand-Alone on a Computer
Omnisphere was designed to work as a plug-in which closely integrates within your main sequencing application and computer. We recommend using it this way for best results.
Alternatively, Omnisphere may also be used with a simple host application to work as a sound module for live performance. Omnisphere has specials modes which are designed to make it an ideal instrument for use in live situations.
Thirdly, you can also use Omnisphere on dedicated hardware music computers like the MUSE Receptor and NEKO Keyboards, which essentially are PCs dedicated for music performance.
However, there are a few things to keep in mind with using Omnisphere on a standalone system:
1. Omnisphere must reside in a host application on the other computer
2. Omnisphere is a plug-in and does not function as a stand-alone application. It must function as a Virtual Instrument plug-in within a host regardless of what computer it's on. There are many free and inexpensive VST and Audio Unit host applications that will run Omnisphere.
You can get a comprehensive list of hosts on www.kvraudio.com
Latency and Timing accuracy
As a result of being on a stand-alone computer, the latency between MIDI and Audio interfaces will cause Omnisphere to play later than it would on the main sequencing computer, so you will need to compensate for the latency. Also, when Omnisphere is used on the main computer, the timing of playback is extremely tight - sample-accurate in most cases. On a slave system, this type of accuracy is not currently possible.
GETTING STARTED - Checking For Updates
The latest versions of the software, Soundsource library, and patch library for
Omnisphere can be found on our website at:
http://www.spectrasonics.net/updates
With Omnisphere, we've included a way to quickly check for updates directly from the plug-in.
Simply click the Spectasonics logo to reveal the credits page. At the top left, select the button ‘Check For Updates’:

Selecting it will compare the current installed versions on your system with the latest available updates on the Spectrasonics website. Remember there are separate versions for the Omnisphere software, Soundsources and patches, so make sure that all three are always up to date.