GETTING STARTED - Mac OS-X Installation on the Startup Drive
Follow this set of instructions to install the Omnisphere
large sound library files onto your startup hard drive. You need almost 50GB of
free space available on your startup hard drive in order to continue. If you
want to install Omnisphere to an external hard drive, please skip to the MAC
OSX - CUSTOM INSTALLATION set of instructions here.
NOTE: These screenshots are taken in OSX Leopard.
Installation on OSX Tiger will look slightly different.
INSTALLING DISC 1
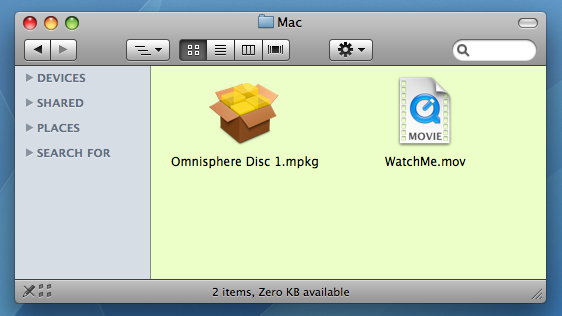
1. After inserting Omnisphere Disc 1 into the computer, open
the disc to reveal its contents from the Desktop.
2. Open the Mac folder, then double-click "Omnisphere
Disc 1" to begin the installation of Omnisphere.
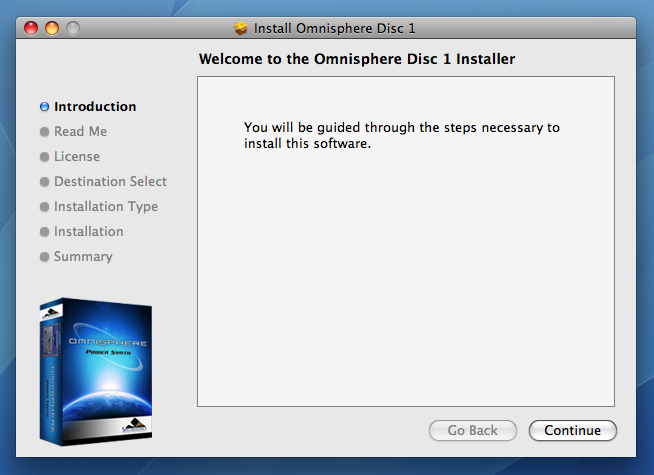
3. Click "Continue".
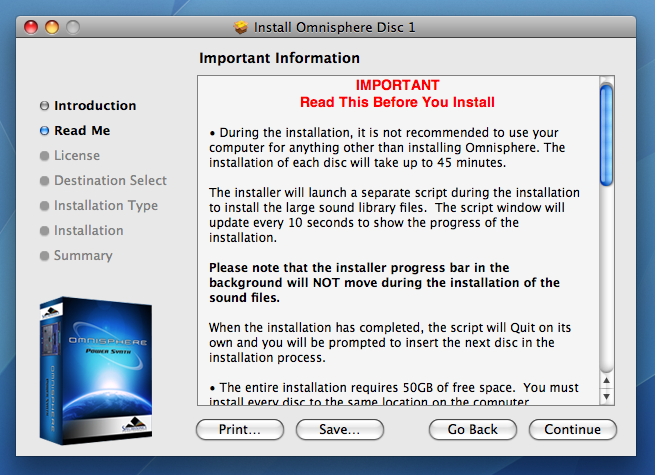
4. Read this important information about the installation
process before you install. Click "Continue" to proceed.
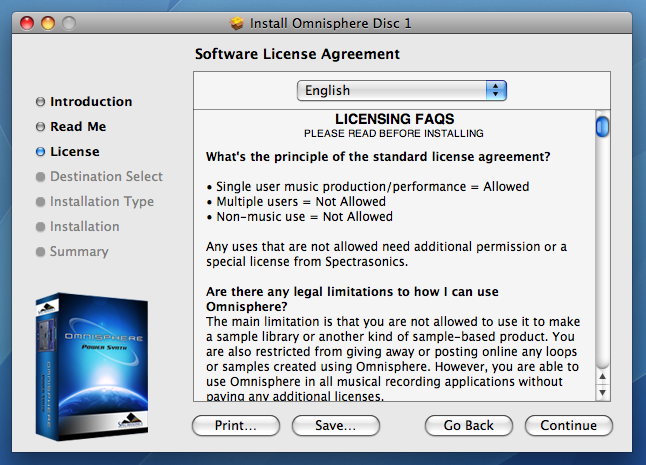
5. After reading through the licensing FAQs, click
"Continue".
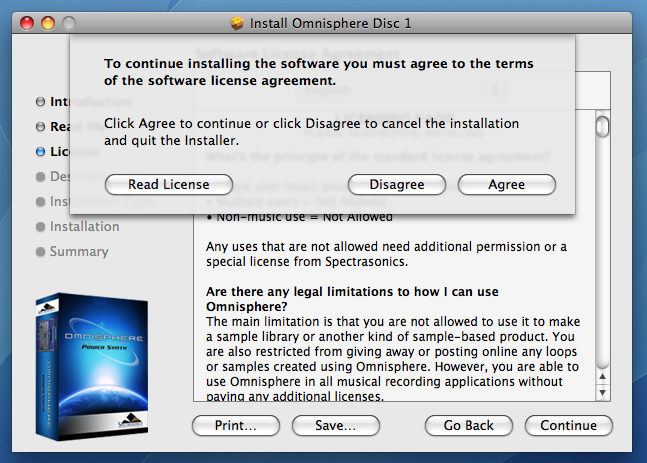
6. You will then be prompted by another window. Choose
"Agree" if you fully understand the licensing agreement to continue.
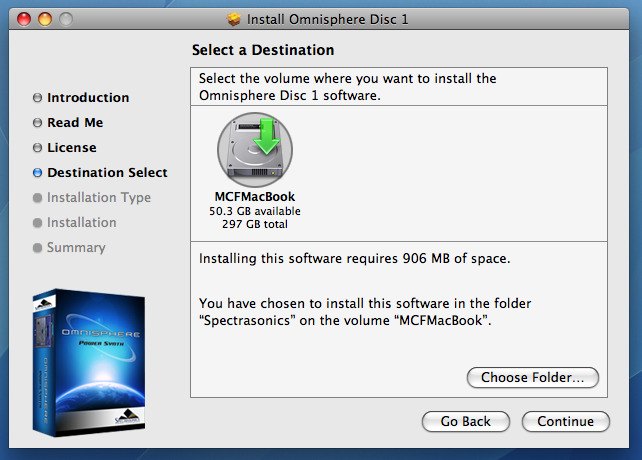
7. Simply click “Install” to agree to begin installing
Omnisphere to the startup hard drive. This is the default installation.
Remember there needs to be almost 50GB of free space available on the startup
drive in order to completely install Omnisphere.
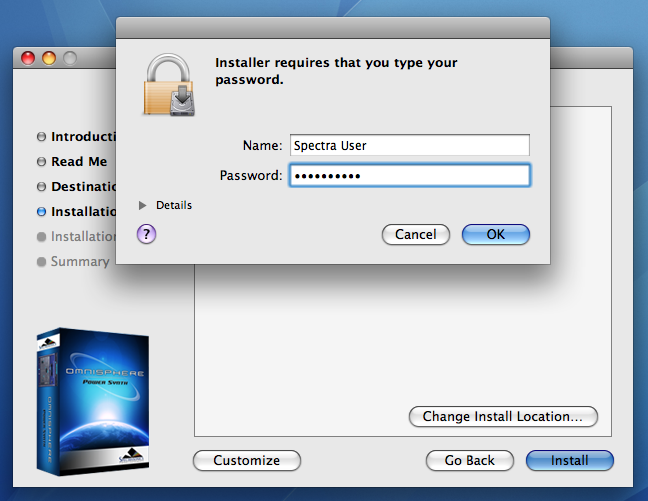
8. Enter the password for your Mac OSX user account to
continue the installation.

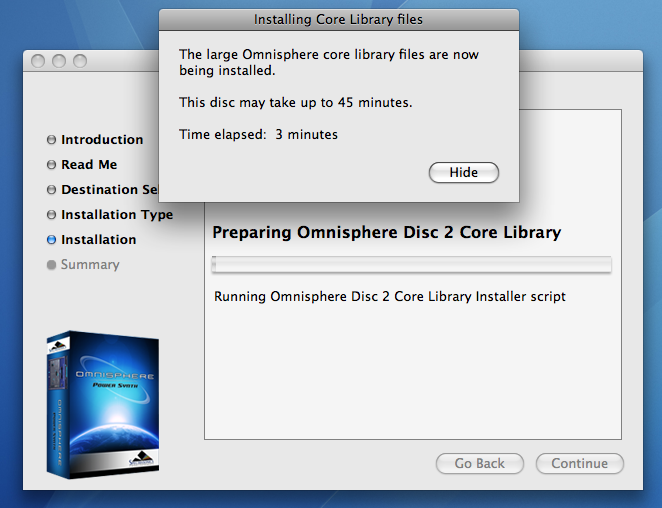
9. The disc will now install. The installation of each disc
will take up to 45 minutes. The installer will launch a separate script during
the installation to install the large sound library files. The script window
will update every 10 seconds to show the progress of the installation.
NOTE: The installer progress bar in the background will
not move during the installation of the sound files. This is normal and
installation progress will be shown via the “Time Elapsed” area of the script
window.
During the installation, it is not recommended to use your
computer for anything other than installing Omnisphere. The script window will
beep and bounce in the dock if other applications are opened. This is because
the script window wants to be the top window on screen at all times. Doing
other things while installing probably won’t jeopardize the installation, but
you should be aware of how the installer script behaves. Selecting the “Hide”
button will cause the script window to vanish until the installation completes.
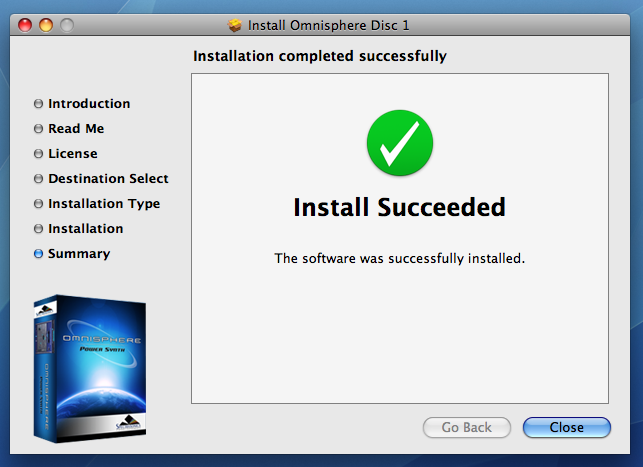
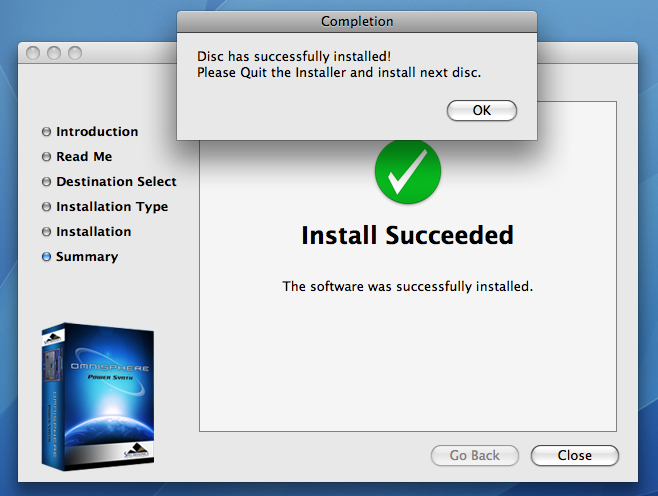
10. Once the disc has finished installing, click “OK”, then
“Close”, and continue by installing the next disc.
INSTALLING DISC 2 - DISC 6
The following instructions apply to Disc 2 through 6.
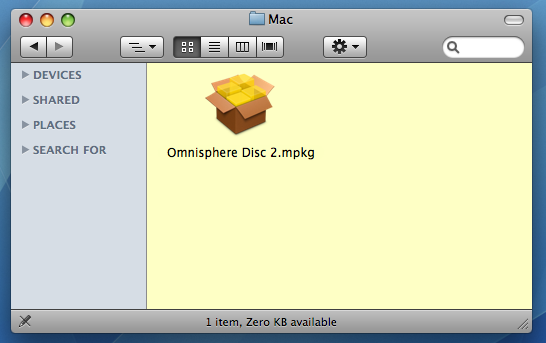
11. After inserting Omnisphere Disc 2 into the computer, open
the disc to reveal its contents from the Desktop.
12. Open the Mac folder, then double-click "Omnisphere
Disc 2" to begin the installation of Omnisphere.
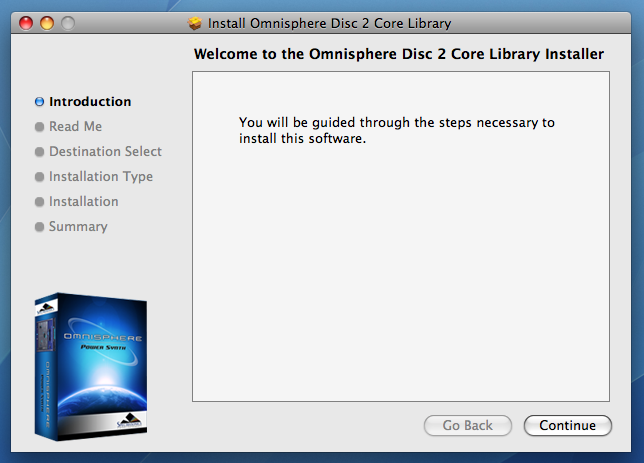
13. Click "Continue".
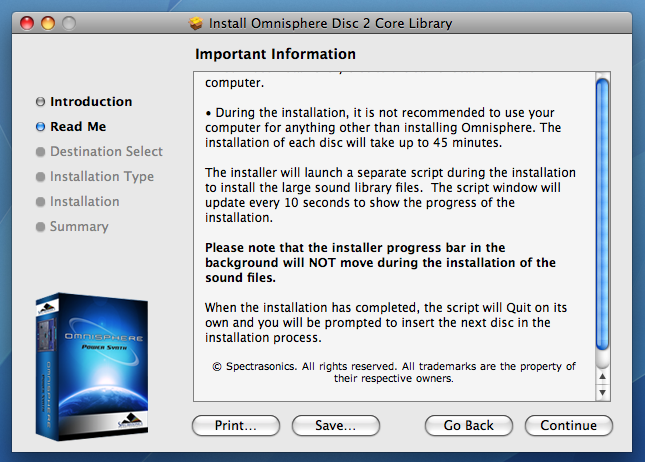
14. Read this important information about the installation
process before you install. Click
"Continue" to proceed.
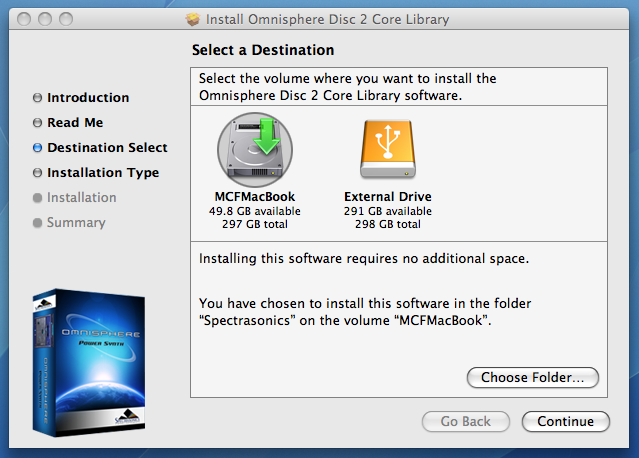
15. Now choose the same installation destination as you did
for Disc 1. Simply click “Install” to continue installing the large sound library
files to the startup hard drive.
16. Enter the password for your Mac OSX user account to
continue the installation.
17. The disc will now install. The installation of each disc
will take up to 45 minutes. The installer will launch a separate script during
the installation to install the large sound library files. The script window
will update every 10 seconds to show the progress of the installation.
NOTE: The installer progress bar in the background will not
move during the installation of the sound files. This is normal and
installation progress will be shown via the “Time Elapsed” area of the script
window.
During the installation, it is not recommended to use your
computer for anything other than installing Omnisphere. The script window will
beep and bounce in the dock if other applications are opened. This is because
the script window wants to be the top window on screen at all times. Doing
other things while installing probably won’t jeopardize the installation, but
you should be aware of how the installer script behaves. Selecting the “Hide”
button will cause the script window to
vanish until the installation completes.

18. Once the disc has completed installing, click “OK”, then
“Close”, and continue by installing Disc 3 through 6 exactly as was just done
for Disc 2. After installing Disc 6, the installation will be complete.
Once the installation of all six discs is complete, it’s now
time to open
Omnisphere in your host sequencer and authorize it.
Please consult the Authorization section for assistance with authorizing Omnisphere.