

The Groove Lock section lets you to lock the feel of a Groove to a Groove Lock Grid.
The Groove Lock Grid represents the underlying rhythmic subdivisions to which slices of a Groove can be locked. Once a Groove Lock Grid is selected, you can adjust Groove Lock Strength, add Swing, and even make the resulting feel more natural using the Natural switch.
NOTE: Using Groove Lock lets you make a Groove less busy using the Simplify parameter. This function operates independently from the Groove Lock Grid, and when applied will always affect the Groove. This is true even if no Groove Lock Grid is selected.
The other controls in this section (Strength, Swing, and Natural) will only change the Groove when a Groove Lock Grid selection has been made.
Watch The Time Designer and Time Designer in Groove Menu tutorials.
PATTERN DISPLAY AREA

The Pattern Display area shows the Groove Lock Grid, as well as Slice Markers for both the original and modified timings of the Groove. It’s intended to provide visual feedback of the processing taking place when using Time Designer. For longer or more complex Grooves you can zoom and move the display position for more detail.
The Groove Lock Grid
The Groove Lock Grid represents the underlying rhythmic subdivisions to which slices of a Groove can be locked. The display shows numbered measures, which are divided into beats based on the Grid being used.
Slice Markers
There are two rows of Slice Markers showing the timing of the groove:
- The upper row contains shaded slice markers representing the original timing of the slices.
- The lower row contains brighter slice markers representing the timing of the slices after they’ve been manipulated using Time Designer.
NOTE: The Half Time/Double TIme Buttons and Pattern Modify parameters do not have any affect on the Pattern Display.
Zoom and Move
- To zoom in or out in the Pattern Display, place the mouse cursor over the display area and use the scroll wheel.
- To return to the default zoom, Command-click in the display area.
- To move the display position, click and drag left or right over the display area.
GROOVE LOCK GRIDS
The Groove Lock Grid represents the underlying rhythmic subdivisions to which slices of a Groove can be locked.

The Groove Lock Grid Display shows the currently selected Grid, and provides access to a menu of rhythmic values, other Parts, and Factory Groove Templates.
Click on the Groove Lock Grid Display to access the Grid Menu.
The Groove Lock Grid Menu is divided into three sections; Rhythmic Grids, Part Grids, and Factory Templates.
Rhythmic Grids

A full range of Rhythmic Grids are provided. Selecting a Rhythmic Grid will lock the current Groove to the selected note value.
For example, if you select 1/8 Note Grid, the notes in a busy 16th-note groove will quantize to the selected 1/8th note grid, if maximum Strength is applied.
Part Grids
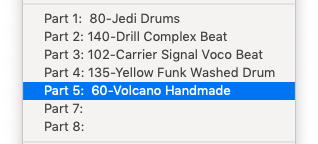
The Part Grids show the Elements currently loaded into the Parts in the Multi. By selecting one of the Parts, the current Groove can be Groove-Locked to any other Groove loaded in RMX.
This means you can Groove-Lock the feel of any Groove to any other Groove in the entire RMX Library.
However, when Groove-Locking between Grooves, the “slave” is locked to the original feel of the “master” Groove, and not to the modified feel of the “master” after Time Designer processing has been applied.
For example, if the “master” Groove loaded in Part 1 originally had a straight feel and Swing was applied in Time Designer, the “slave” will be locked to the original straight feel, not the modified swing feel.
NOTE: “Slaved” Grooves do not automatically update their Groove Lock Grid if a different “master” Element is selected in the Browser. If a different “master” Element is selected, “slaved” Grooves will have to be Groove-Locked again by selecting the new Element from the Groove Lock Grid Menu.
Factory Groove Templates
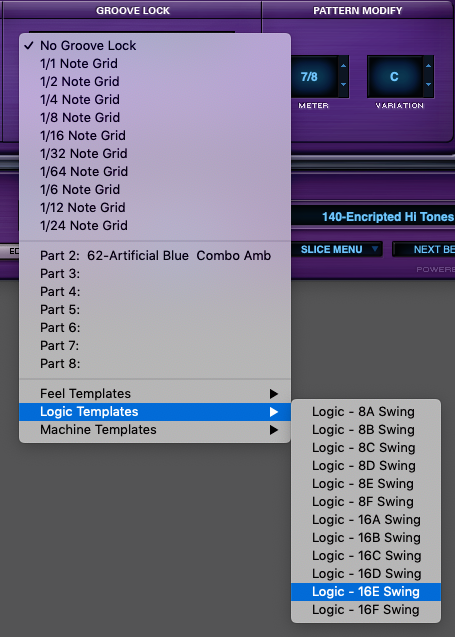
At the bottom of the Groove Lock Menu, there is a selection of Factory Groove Template sub-menus. The included templates offer a wide variety of useful feels from which to choose:
1. The Feel Templates folder offers live Grooves from a variety of musical styles.
2. The Logic Templates folder contains Groove templates from Logic.
3. The Machines Templates folder contains templates created using classic hardware drum machines.
Once selected, the Groove Lock Grid Template will be applied to the Groove in the currently selected Part.
NOTE:To maintain the feel of the loaded Factory Template while browsing, disable the Settings Button in the Browser.
USING MIDI FILES FOR A GRID
You can import any external MIDI file for use as a Groove Lock Grid. See the chapter on MIDI Files for details.
STRENGTH

The Strength slider controls how much the slices of a Groove will be moved towards (tighter) or away (looser) from their nearest grid point. At the center, the selected Groove Lock Grid will have no effect and the slices will remain at their original timing positions.
SWING

The Swing knob controls how much swing feel is applied when using Rhythmic Grids.
The Swing knob delays slices starting on the “offbeats” of the selected Rhythmic Grid. For example, when using the 1/8 Note Grid, all the offbeat 1/8 notes will be delayed when using the Swing knob. The higher the Swing value, the longer the delay time for the offbeat slices.
NATURAL

When the Natural switch is enabled, it preserves the position of slices that are far from the Groove Lock Grid, and allows the Strength slider to affect only the slices that are close to the Grid.
NOTE: The Natural switch only has an effect when a Rhythmic Grid has been selected from the Groove Lock Grid Menu and lets some slices “pass through” without being affected by the Strength parameter. For example, on a Groove that is playing mostly 16th notes and a few 32nd note embellishments, selecting the 1/16 Note Grid, then enabling the Natural switch, will retain the original position of the embellishments while tightening the 16th notes as Strength is moved toward the maximum “tight” position.